
🚨 $PORTAL | REJECTION SETUP 🔴
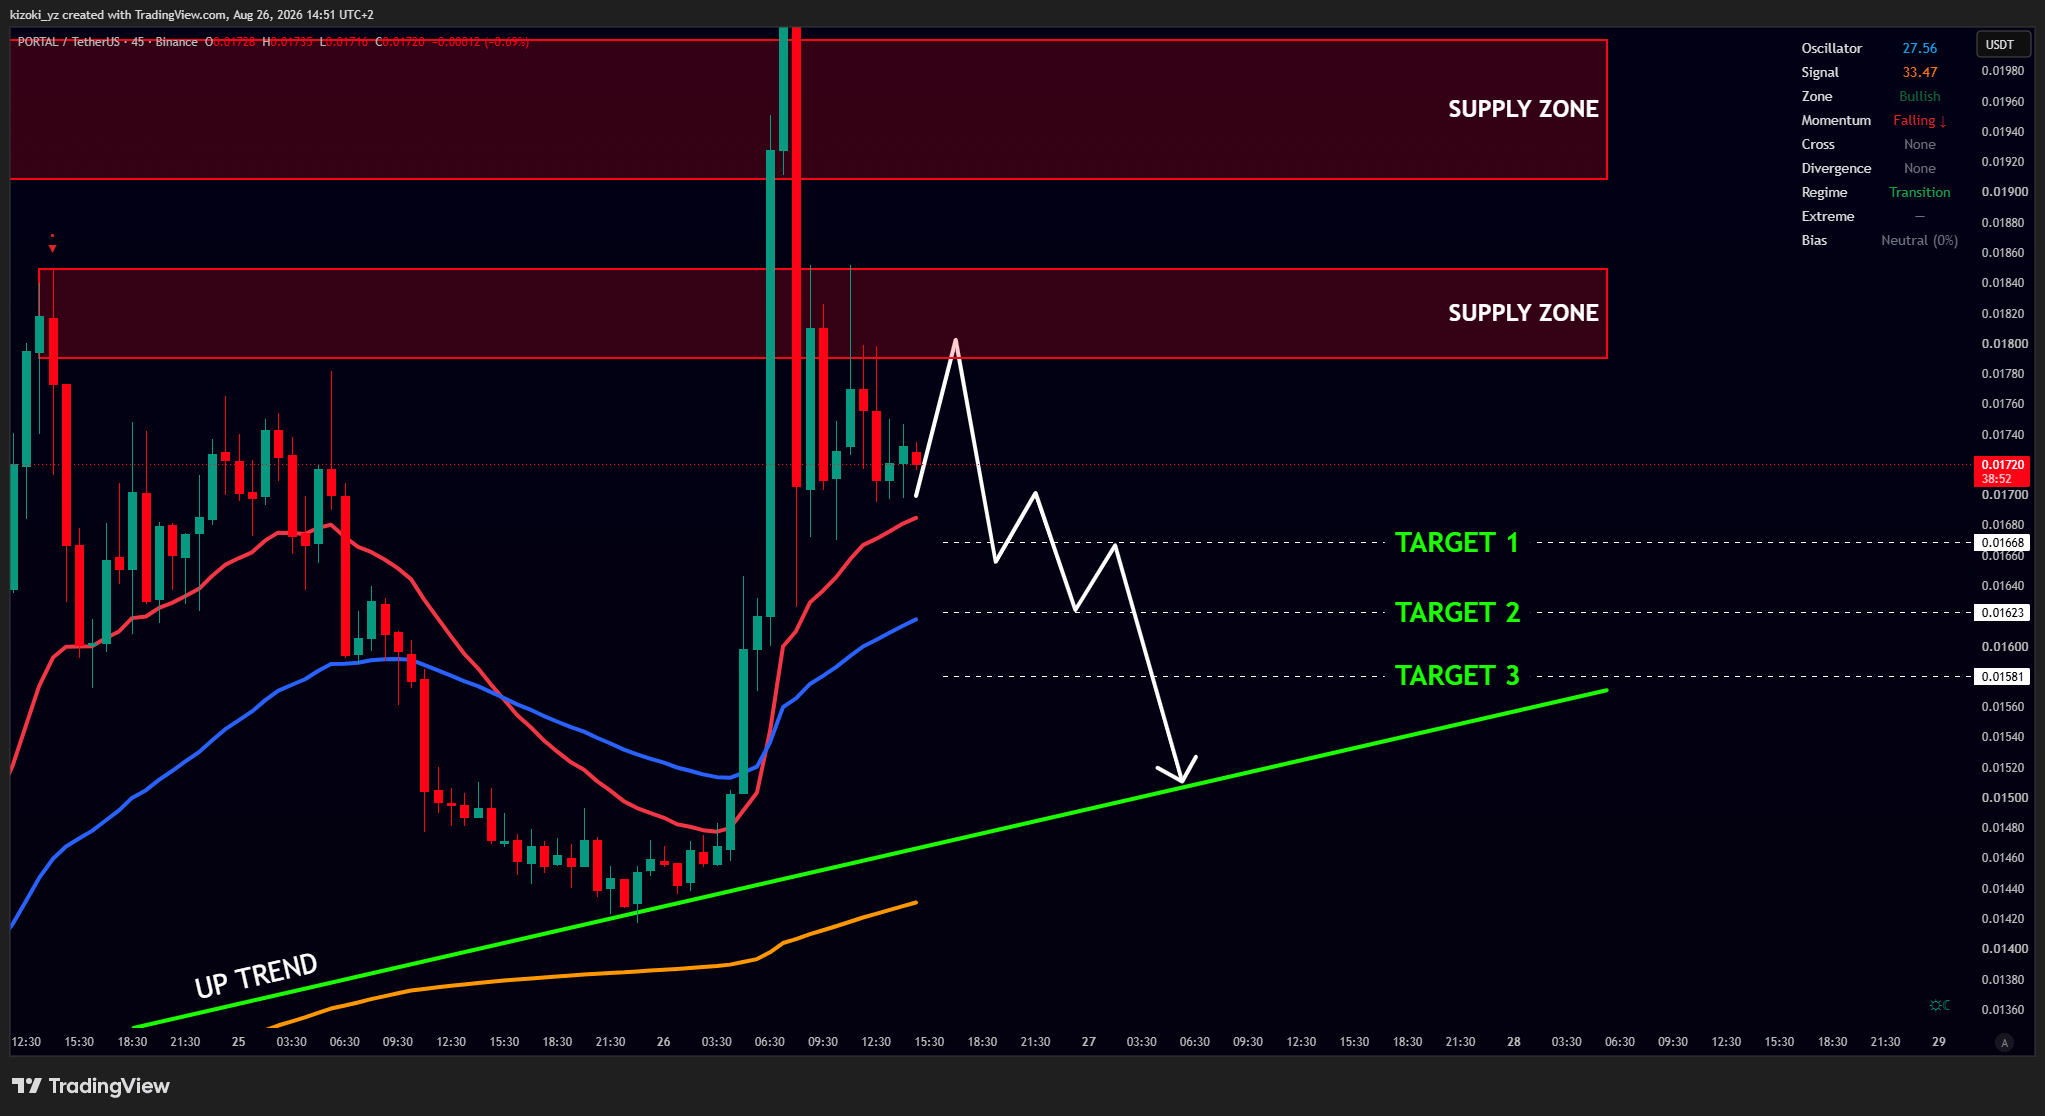
After the rapid rise and impact at the bottom of the main display area, $PORTAL moves to form a bearish rejection with a pullback in momentum.
🔴 Monitoring Zone: 0.01790$– 0.01716$ (the lower red zone)
🎯 Targets:
TP1: 0.01668$
TP2: 0.01623$
TP3: 0.01581$
TP4 (main trend line): 0.01520$– 0.01540$
🛑 Invalidate the scenario: 0.01890$ (breakout of the lower supply zone and closing above it)
📌 Scenario: We wait for a corrective upward move to test the supply zone between 0.01790$– 0.01850$ and confirm the rejection there, followed by completing the downward corrective wave toward the specified support targets, up to the main ascending trend line.
⚠️ Note: The momentum indicator is currently declining), so the best advantage of the trade lies in waiting for a retest within the supply zone and adhering to the specified stop-loss.
After the rapid rise and impact at the bottom of the main display area, $PORTAL moves to form a bearish rejection with a pullback in momentum.
🔴 Monitoring Zone: 0.01790$– 0.01716$ (the lower red zone)
🎯 Targets:
TP1: 0.01668$
TP2: 0.01623$
TP3: 0.01581$
TP4 (main trend line): 0.01520$– 0.01540$
🛑 Invalidate the scenario: 0.01890$ (breakout of the lower supply zone and closing above it)
📌 Scenario: We wait for a corrective upward move to test the supply zone between 0.01790$– 0.01850$ and confirm the rejection there, followed by completing the downward corrective wave toward the specified support targets, up to the main ascending trend line.
⚠️ Note: The momentum indicator is currently declining), so the best advantage of the trade lies in waiting for a retest within the supply zone and adhering to the specified stop-loss.