
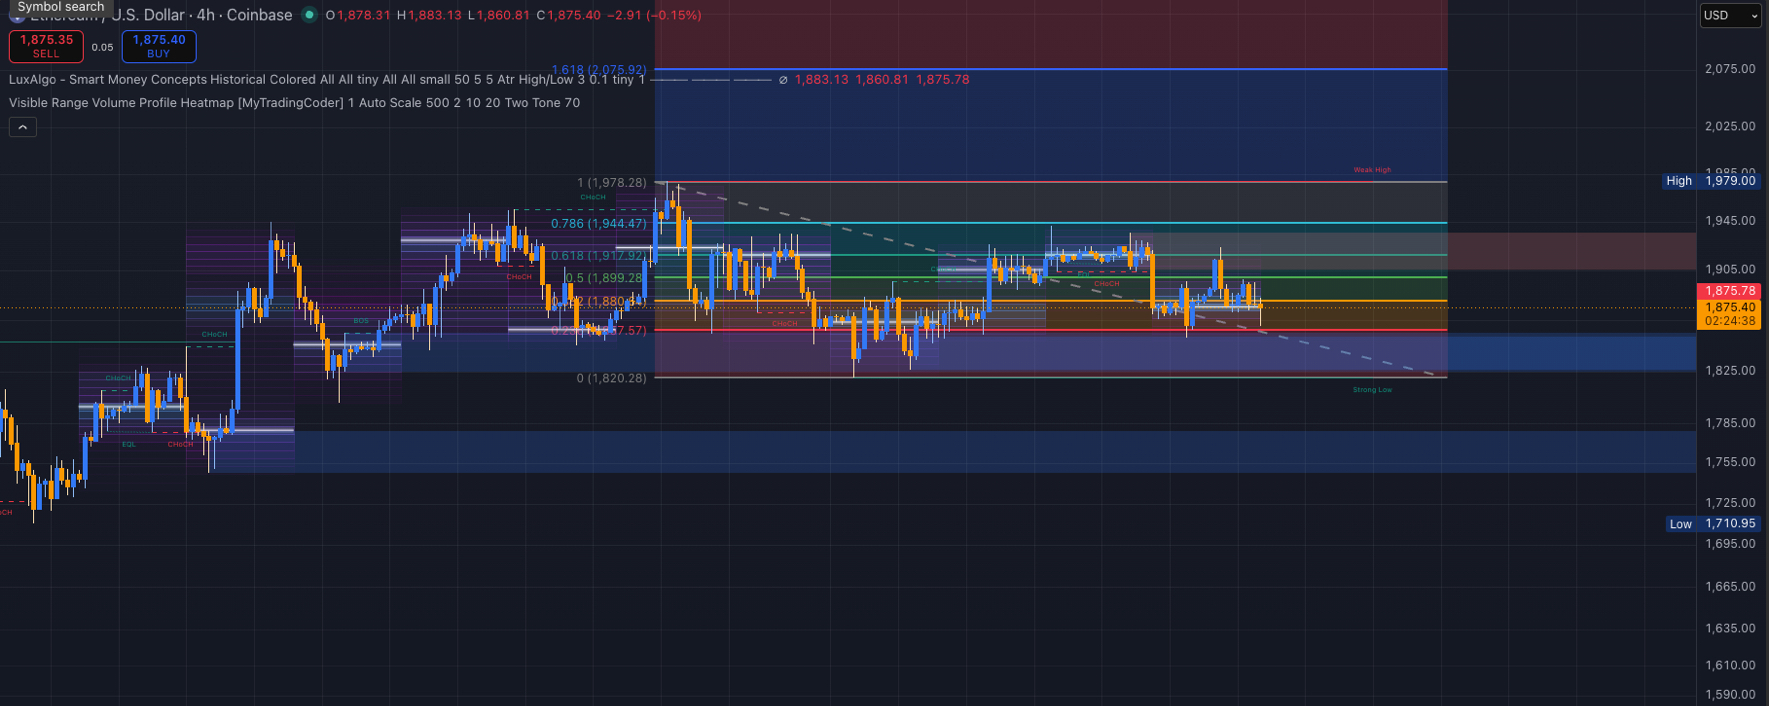
Most traders made the same mistake: they see an Order Block or FVG and immediately place a limit order from its edge. The result? Too large a stop-loss or getting stopped out by a false move.
To find the ideal entry point (Sniper Entry) with minimal risk and a high R:R (Risk/Reward), you need to look for confluence— the alignment of several independent factors in one point.
Here’s the combination of 3 elements that gives the highest execution percentage:
1️⃣ Context and Structure (Smart Money Concepts)
What we do: We determine the market direction, find liquidity sweep (Sweep), and confirm price entry into the POI (Point of Interest) — Order Block or FVG on a higher timeframe (for example, 4H).
Result: We know where the big player left their mark and where they plan to move the price.
2️⃣ Exact price level (Volume Profile)
What we do: We overlay the Fixed Range / Session Volume Profile or a Heatmap onto our zone of interest.
Result: The Order Block zone can be wide (for example, $30–50 on ETH). The Volume Profile shows the POC (Point of Control) — the specific price level where the largest volume was traded. This is our “sniper line.”
3️⃣ Mathematical correction depth (Fibonacci OTE)
What we do: We draw the Fibonacci grid on the last key impulse (from point 1 to point 0).
Result: We look for OTE levels (Optimal Trade Entry): 0.618, 0.705, and 0.786. Big institutional players build positions right in this mathematically favorable zone.
📌 How it works in practice:
When your Support/Resistance Zone (SMC) aligns with the brightest Volume Profile band and the golden Fibonacci intersection (0.618–0.786) — you get the strongest setup.
➡️ Stop-loss: at point 1 (impulse extreme).
➡️ Take-profit: at the update to point 0 or the nearest liquidity pool.
⚡ Main rule: Don’t overload the chart with dozens of indicators. Three tools that complement each other (Structure + Volume + Math) give a clean picture and confidence in every trade!