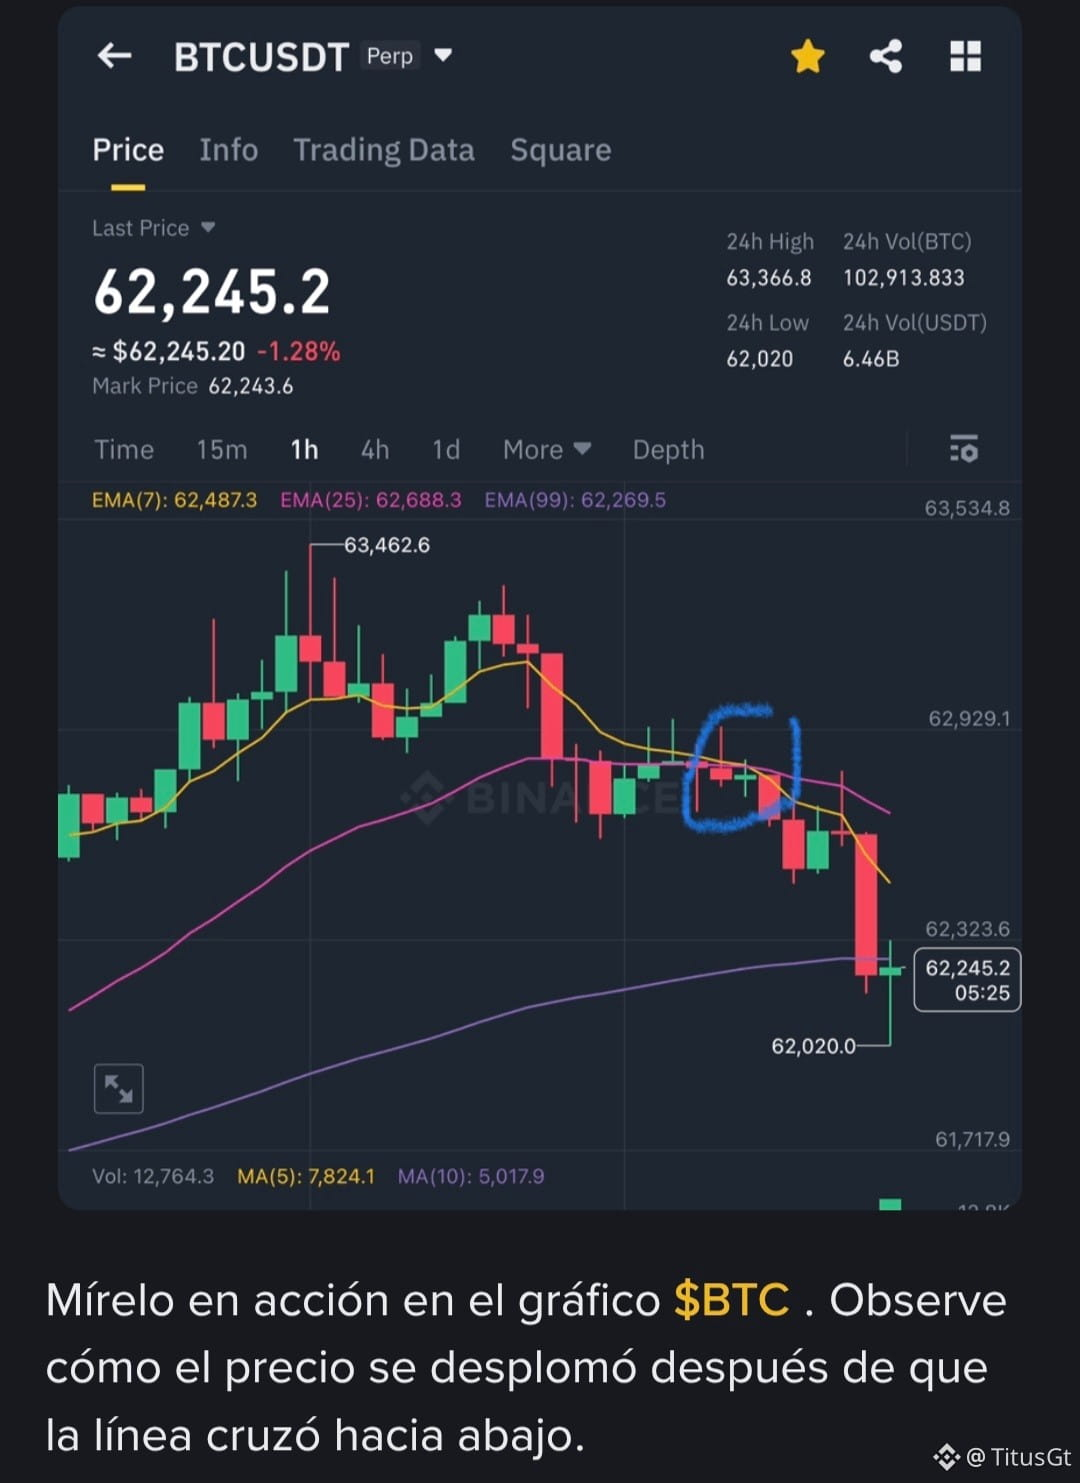
important note for those who still do not know
As a professional or beginner trader, you cannot ignore the fact that there is a simple way to have a clue about the future market trend, BUY or SELL, even if it's not exactly on time.
The EMA(7) or the first line of the EMA indicator (regardless of what it was calibrated with) is a very useful line that draws your attention to a rise or fall in the price of your target token. When it goes up, literally, your attention should be directed to an increase in price, while when it goes down, the price is likely to plummet for some corrections.
The EMA(25) or the second line of the EMA indicator is like a confirmation of the direction indicated or initiated by the EMA(7). When the EMA(7) crosses downwards, passing through the EMA(25), our expectations should lean towards a price drop. This is a very good basis for guiding us in trade entries and avoiding starting trades with a negative outcome. Conversely, when the EMA(7) crosses the EMA(25) upwards, we expect to see a price increase.
As a professional or beginner trader, you cannot ignore the fact that there is a simple way to have a clue about the future market trend, BUY or SELL, even if it's not exactly on time.
The EMA(7) or the first line of the EMA indicator (regardless of what it was calibrated with) is a very useful line that draws your attention to a rise or fall in the price of your target token. When it goes up, literally, your attention should be directed to an increase in price, while when it goes down, the price is likely to plummet for some corrections.
The EMA(25) or the second line of the EMA indicator is like a confirmation of the direction indicated or initiated by the EMA(7). When the EMA(7) crosses downwards, passing through the EMA(25), our expectations should lean towards a price drop. This is a very good basis for guiding us in trade entries and avoiding starting trades with a negative outcome. Conversely, when the EMA(7) crosses the EMA(25) upwards, we expect to see a price increase.