This article may help you get the qualification for the upcoming airdrop. Although it is not 100% obtained, there is no reason not to do it, because if you get the airdrop, the subsequent amount will be huge. These are super ecological!
If you have any questions you don’t understand, please follow me and I will answer them for you!
zkSync interaction strategy:
Step 1: Transfer funds to zkSync
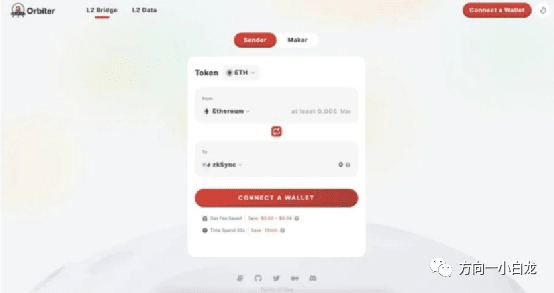
Method 1: Transfer funds to zkSync through Orbiter Finance
Use Orbiter Finance to transfer funds to zkSync. Orbiter is a cross-chain bridge that supports ETH, USDC, and USDT transfers from various blockchains.
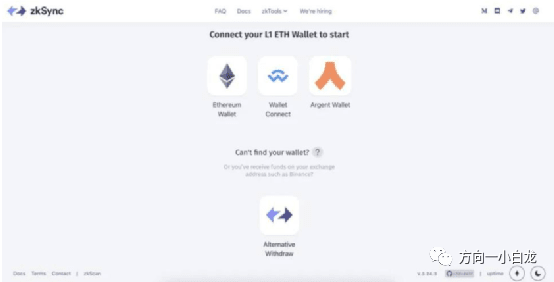
Method 2: Transfer funds to zkSync using the zkSync bridge
You can connect your wallet and transfer funds from Ethereum mainnet to zkSync. The zkSync bridge is the official way to transfer funds to zkSync.
Between these two methods, we recommend using both if you want to qualify for an airdrop with the highest probability of success.
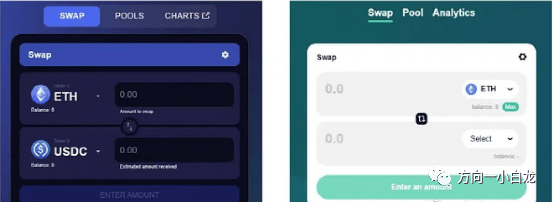
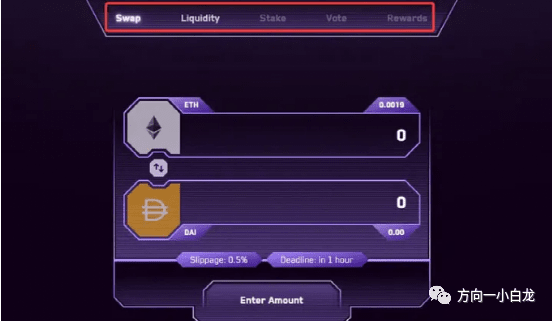
Step 2: Trade on ZigZag Exchange
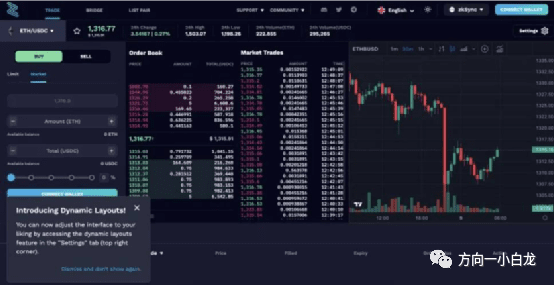
Zigzag is a decentralized, non-custodial order book trading platform.
We can do some transactions on the platform. For example, we can exchange our ETH for USDC and then exchange it back.
Step 3: Donate on Gitcoin and checkout via zkSync
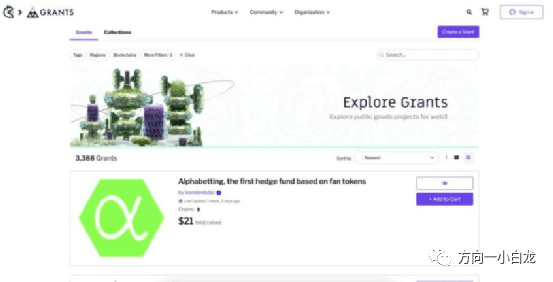
Gitcoin is a platform for funding various tools. You can browse projects that may become part of the future of the Internet. Gitcoin grant donations can be checked through the zkSync network to get cheaper transaction fees.

Step 4: Claim token faucet on zkSync 2.0 Goerli
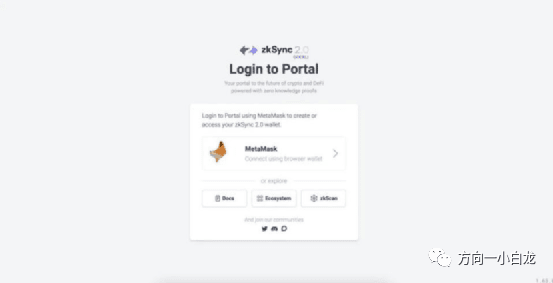
Request some testnet tokens from the faucet on the zkSync 2.0 portal, the first EVM-compatible ZK-rollup.
Step 5: Trade on SyncSwap — zkSync 2.0 Testnet
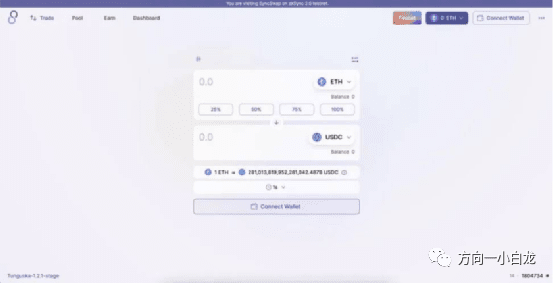
Once we have our own token faucet, we can visit SyncSwap and do some trades with these fake tokens. You can click on the faucet in the top right corner to get more tokens if needed.
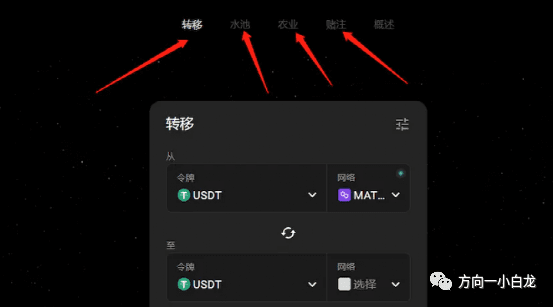
除了进行互换,你还可以向池中添加流动性。
Step 6: Mint NFT on MintSquare
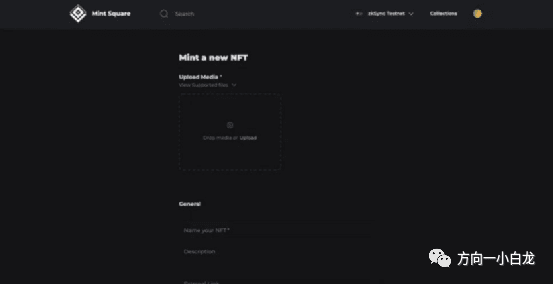
Head over to MintSquare (an NFT storefront on zksSync) and mint a new NFT on the zkSync testnet. Just find any cute picture and upload it to the site.
Give your NFT a name, attributes, and click mint.
Step 7: Trade on 1kx and add liquidity
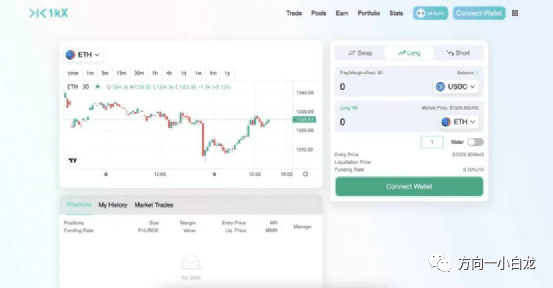
You also want to continue trading and adding liquidity on as many indices as possible. 1kx is another zkSync DEX where you can trade. 1kx is unique in that it allows for single token liquidity pools by pairing with its stablecoin OSD.
Layer Zero Interaction Strategy:
Step 1: Use stargate
Stargate has already issued a coin, but it is the biological child of layerzero, so the focus is on interaction
Regularly use stargate to cross-chain, add liquidity, pledge LP, purchase STG pledge, vote, etc.
Step 2: NFT cross-chain
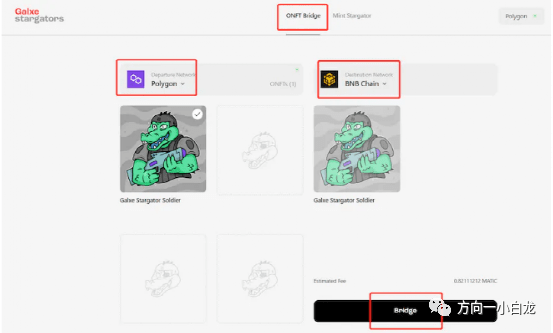
Optimism is carrying out 18 NFT activities in Galaxy, and the extra crocodile NFTs are transferred between different chains through Galaxy.
Step 3: USDC cross-chain testing
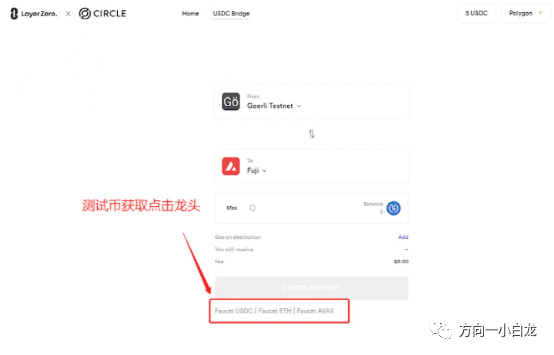
On September 29, 2022, LayerZero announced that it and Circle launched a full-chain cross-chain USDC test (tweet)
This test is very simple, so make sure you take the time to complete it.
Step 4: Use the cross-chain bridge APTOS BRIDGE
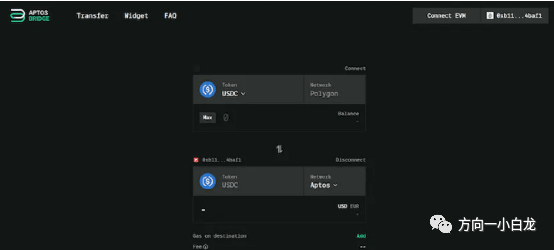
On October 19, 2022, LayerZero launched a cross-chain bridge to Aptos.
StarkNet interaction strategy:
The first method: Configure a digital wallet
Install a wallet supported by the StarkNet network, Agent X or Braavos, you can choose a suitable one.
Install the proxy wallet
Install Braavos Wallet
It also needs to be sent tokens in order to be able to interact with the protocol we are going to introduce.
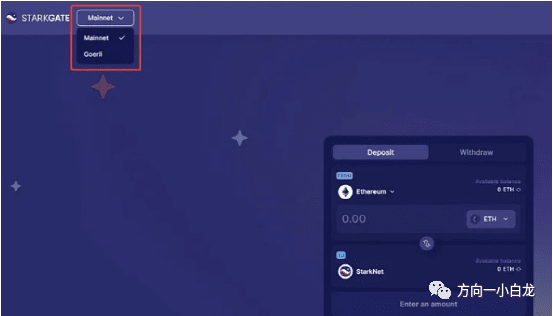
Then go to the StarGate bridge, select Metamask and StarkNet wallets, and finally, enter the amount of tokens you want to send to the StarkNet network. Remember to specify which network you want to use (Mainnet or Gorley) in the upper right corner.
Note that for the mainnet, Metamask must be configured on the "Ethereum" network; for the testnet, it will be the "Tesnet Goerli" network. In both cases, ETH tokens (preferred) must be sent to the StarkNet wallet.
Get ETH Goertek (tesnet) tokens (0.2 Goertek ETH per day).
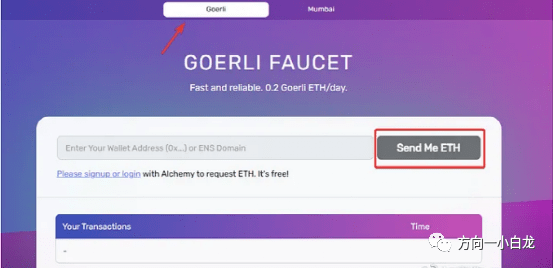
It is also possible to deposit Tesnet ETH tokens directly into a StarkNet wallet (token limit is 0.002 ETH). Generally 5 to 10U should be enough to interact with most mainnet protocols.
Second: Mint Square (Mainnet)
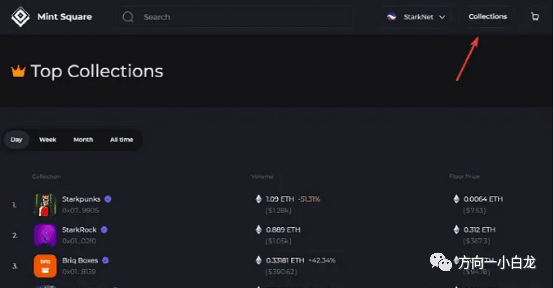
Mint Square is an NFT marketplace running on the StarkNet and Zksync networks.
Once you’re logged into the platform, buy one from one of the existing collectibles (such as StarkNet Monsterz) or mint the NFT (do both to increase your chances).
To buy: select the NFT from your existing collection, click Buy Now, and confirm the transaction in your wallet.
To mint an NFT (more affordable), click “Mint”, import your image, and fill in information about it (name, description, properties…). The only cost is the transaction fee or “gas fee” that needs to be paid to complete the minting of the NFT.
The third type: Aspect (main network)
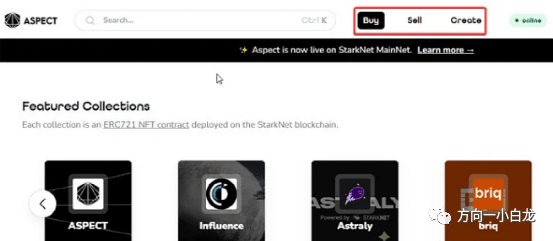
Similar to Mint Square, Aspect is also a marketplace where you can buy and mint NFTs, and the execution process is also to buy or mint NFTs.
For small crypto wallets, the most affordable method is obviously to mint the NFT by clicking the “Create” tab, “Mint NFT”, and entering the data of the non-fungible token.
Fourth: mySwap and 10K Swap (Mainnet)
mySwap and 10K Swap are both decentralized exchanges that can exchange cryptocurrencies and increase liquidity in various pools.
The main purpose here is to use "Swap" and add liquidity to the "pool".
The process is the same for both platforms, click on the “Swap” tab and select the token you want to swap, after confirming the transaction on your wallet, go to the “pool” tab, select a liquidity pool, and fill in the deposit amount.
Fifth: Starknet ID (Mainnet and Testnet)
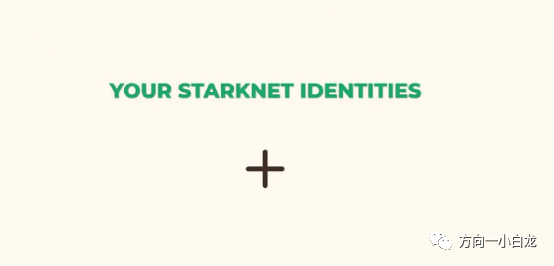
Starknet ID是在StarkNet上开发的域名服务,需要在 Mainnet 和 Tesnet 上完成资格流程,以最大限度地提高机会。
For the testnet, you need to collect free tokens through the "faucet". Once you have done that, visit: starknet, launch the application by clicking "Launch App", and start minting StarkNet on-chain identities. Find a "+" sign under the phrase "Your StarkNet Identities", click it to retrieve the identity.
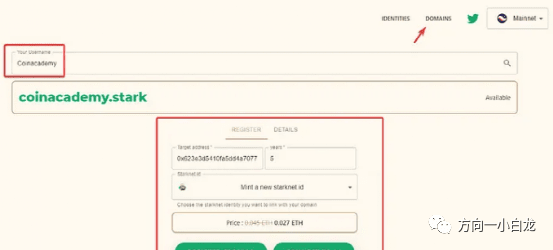
Then, click on the “Domains” tab, and to get a domain name, just enter the name you want to mint, click on it, fill in the StarkNet address and the number of years you want to keep it, and click “Register”.
The sixth type: JediSwap (main network)
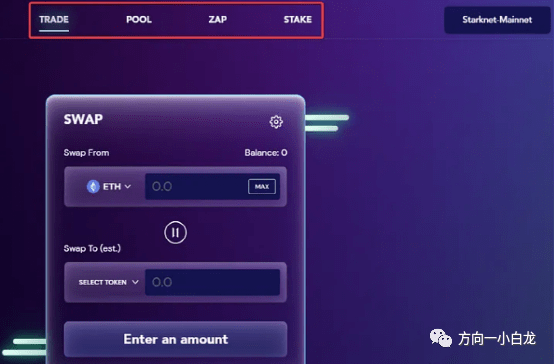
JediSwap is a new decentralized exchange (DEX) and AMM built on StarkNet.
Steps:
Go to: https://jediswap.xyz/
Connect your wallet (Agent X or Braavos)
Click "Launch App" to launch the application
Interact with all features on JediSwap, i.e. swap in the “Trade” tab, adding liquidity in “pool”, and crypto converter in “Zap”.
7. SithSwap (Tesnet)
Like JediSwap, SithSwap is an AMM developed on StarkNet, however, SithSwap is currently only available in Tesnet. Therefore, the following operations must be performed:
Visit: sithswap
Connecting a wallet (in Tesnet)
Interact with the only two available services: Swap and liquidity pool
Allocate some funds to it, then take some out
8. XbankFinance (Tesnet)
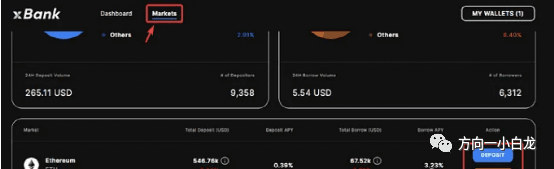
XbankFinance defines itself as the first “non-custodial” DeFi protocol developed on StarkNet.
Go to: xbank
Connect your wallet
Go to the Market page
To use the “Deposit” and “Borrow” features, click on the token of your choice (ETH, USDC, or DAI), select Deposit or Borrow, and enter the amount.
There are dozens of protocols developed on StarkNet, and you can do more research, especially on Twitter, to find the most reliable and promising ones in the ecosystem. And the more protocols you interact with, the greater your chances of getting an airdrop.
Linea Interaction Strategy:
Step 1: Register for Infura
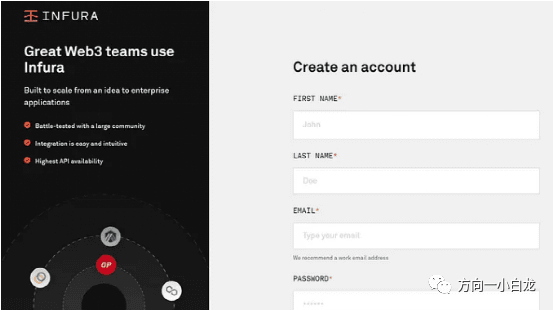
Before you get started, you need to sign up for an Infura account, which is a prerequisite for using the Linea network. The team said "150,000 registrations have been received and this number is expected to grow. Due to such high demand, it may take several weeks for you to get access. While our goal is to allow all users to join the testnet, we may not be able to accommodate everyone on the waiting list."
Translated into human language, it means: Our backs are packed, whether you can get in smoothly depends on your luck.
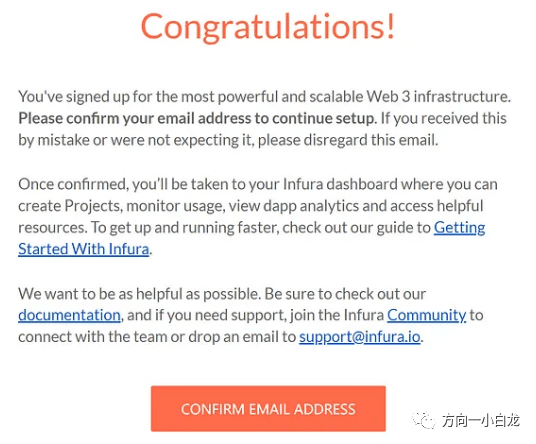
If you're signed up successfully, you'll get your place on the list in your inbox. If you haven't signed up for Infura yet, don't worry, you'll still receive an email detailing the basic steps to get into the Linea beta. But please note that in order to be eligible to test Linea, you must first create a free Infura account.
Step 2: Create an API key
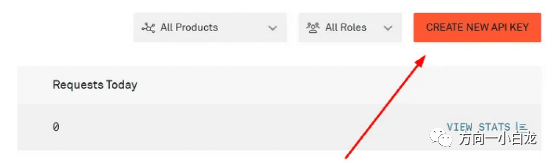
To create an API key, follow these steps
Click this access page to log in to your Infura account
Enter the Infura dashboard
Click on “Create new API KEY”
If you enter through the mailbox, the above steps are not required.
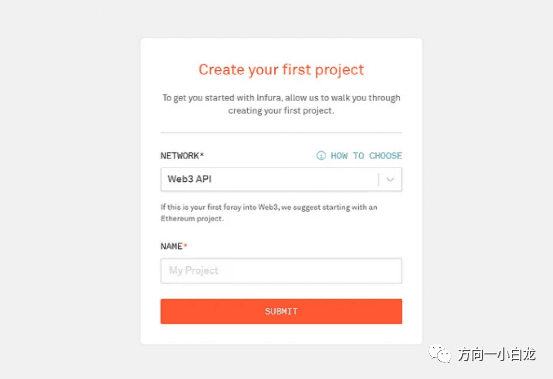
In the pop-up window, select "WEB3 API" and give it a name.
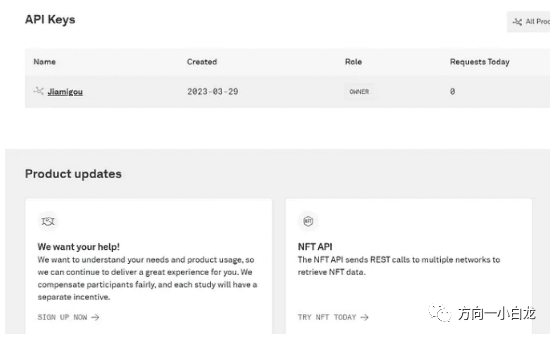
After that, your account and API key are created (API key will be used below)
Step 3: Add the zkEVM testnet to MetaMask
In MetaMask, click "Add Network", select "Manually Add Network", and fill in the following information:
Network name:Line
New RPC URL: https://consensys-zkevm-goerli-prealpha.infura.io/v3/your API key (or directly fill in: https://rpc.goerli.linea.build/)
Chain ID:59140
Currency symbol:crETH
Block explorer URL:https: //explorer.goerll.zkevm.consensys.net
Step 4: Transfer funds from Goerli to zkEVM
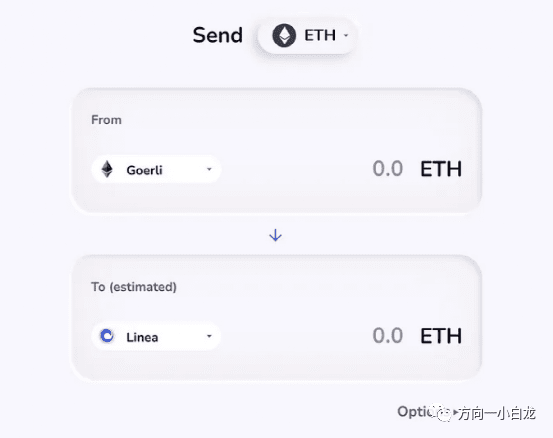
Before transferring funds, make sure you have enough ETH in the Goerli network and that your wallet is correctly configured for the Linea network. To move Goerli ETH to Linea, follow these steps:
Visit Goertek Test Bridge (click here)
Select Goerli
Choose Linea
Select ETH token
Select amount, send
When you are done, switch your MetaMask wallet to the Linea (ConsenSys zkEVM) network.
If you don't have testnet tokens, add me on VX: ETH188088
Step 5: Normal Interaction
Currently you can use Uniswap and Dexchnage to interact with the testnet, and more options will be available in the future.
1. Using Uniswap
The Uniswap v3 protocol has been integrated with ConsenSys’ zkEVM protocol. By operating Uniswap, many functions can be performed, including adding liquidity, token swaps, etc.
Swap
Visit the Uniswap website where you can use Linea (ConsenSys) swaps. You can directly access the swap section here.
Select Ethereum in the upper section and click Consensys Rollup Wrap in the lower section.
Enter the amount you want to exchange
confirm
You can perform multiple swaps in the same way
Increase liquidity
Click the Pool tab
Click New Position and select a token
Enter the quantity of each token and click Supply
Authorized transactions
Liquidity can be increased many more times in a similar manner.
2. Using Dexchange
Dexchange is an “order-book based DEX built on zkSync 2.0” and you can use this platform to interact with the testnet.
Visit the Dexchange website and click "Launch App". You can directly access it through this address
Under “Select Market” select wETH-crUSDC
Add the required amount
Click "Deposit" to confirm the transaction
After depositing funds, you can also perform other trading operations.
3. If the interaction fails
If the above interactions fail, please interact here:
1. Exchange tokens
Exchange tokens on goerli (ETH to crUSDC and vice versa)
2. Adding liquidity
Then provide ETH-crUSDC liquidity
Step 6: Feedback
At this point, the basic interaction of Linea public beta has been completed. Many bloggers don’t know how to interact deeply. They will only tell you to submit feedback and then interact every day. In fact, it’s really over here. You can fill in the feedback form:
如果你想做深度交互(深度交互会极大增加空投概率)