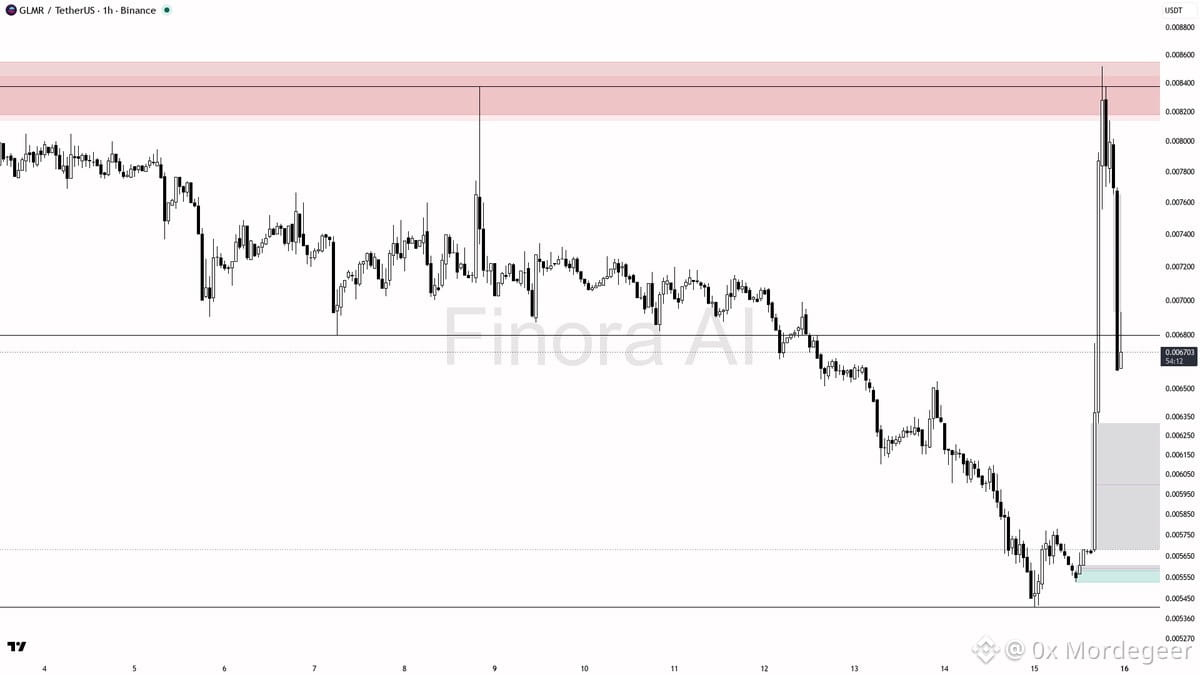
📊 $GLMR Technical Analysis & Setup
GLMR is pulling back on the 1h chart following a sharp surge, presenting a counter-trend opportunity against broader bearish daily and weekly trends while BTC provides underlying buy-side support.
• Key Support / Demand: 0.00626, 0.00639 pullback zone
• Resistance / Supply Targets: 0.00688 first, then 0.00720, with 0.00760 as an extended target on high volume
• Trigger / Confirmation: Bullish engulfing or pin bar pattern coupled with a lower-timeframe higher low; avoid chasing on subdued 0.15x volume
• Risk / Invalidation: 1h close below 0.005527 flips the bullish structure bearish; keep protection beyond structural swing lows
• Market Execution: Monitor order book depth carefully amidst a 5.3% drop in 24h open interest and broader market volatility
DYOR — Educational setup, not financial advice.
#BinanceSquare #Crypto #GLMR #Trading
$BTC
GLMR is pulling back on the 1h chart following a sharp surge, presenting a counter-trend opportunity against broader bearish daily and weekly trends while BTC provides underlying buy-side support.
• Key Support / Demand: 0.00626, 0.00639 pullback zone
• Resistance / Supply Targets: 0.00688 first, then 0.00720, with 0.00760 as an extended target on high volume
• Trigger / Confirmation: Bullish engulfing or pin bar pattern coupled with a lower-timeframe higher low; avoid chasing on subdued 0.15x volume
• Risk / Invalidation: 1h close below 0.005527 flips the bullish structure bearish; keep protection beyond structural swing lows
• Market Execution: Monitor order book depth carefully amidst a 5.3% drop in 24h open interest and broader market volatility
DYOR — Educational setup, not financial advice.
#BinanceSquare #Crypto #GLMR #Trading
$BTC