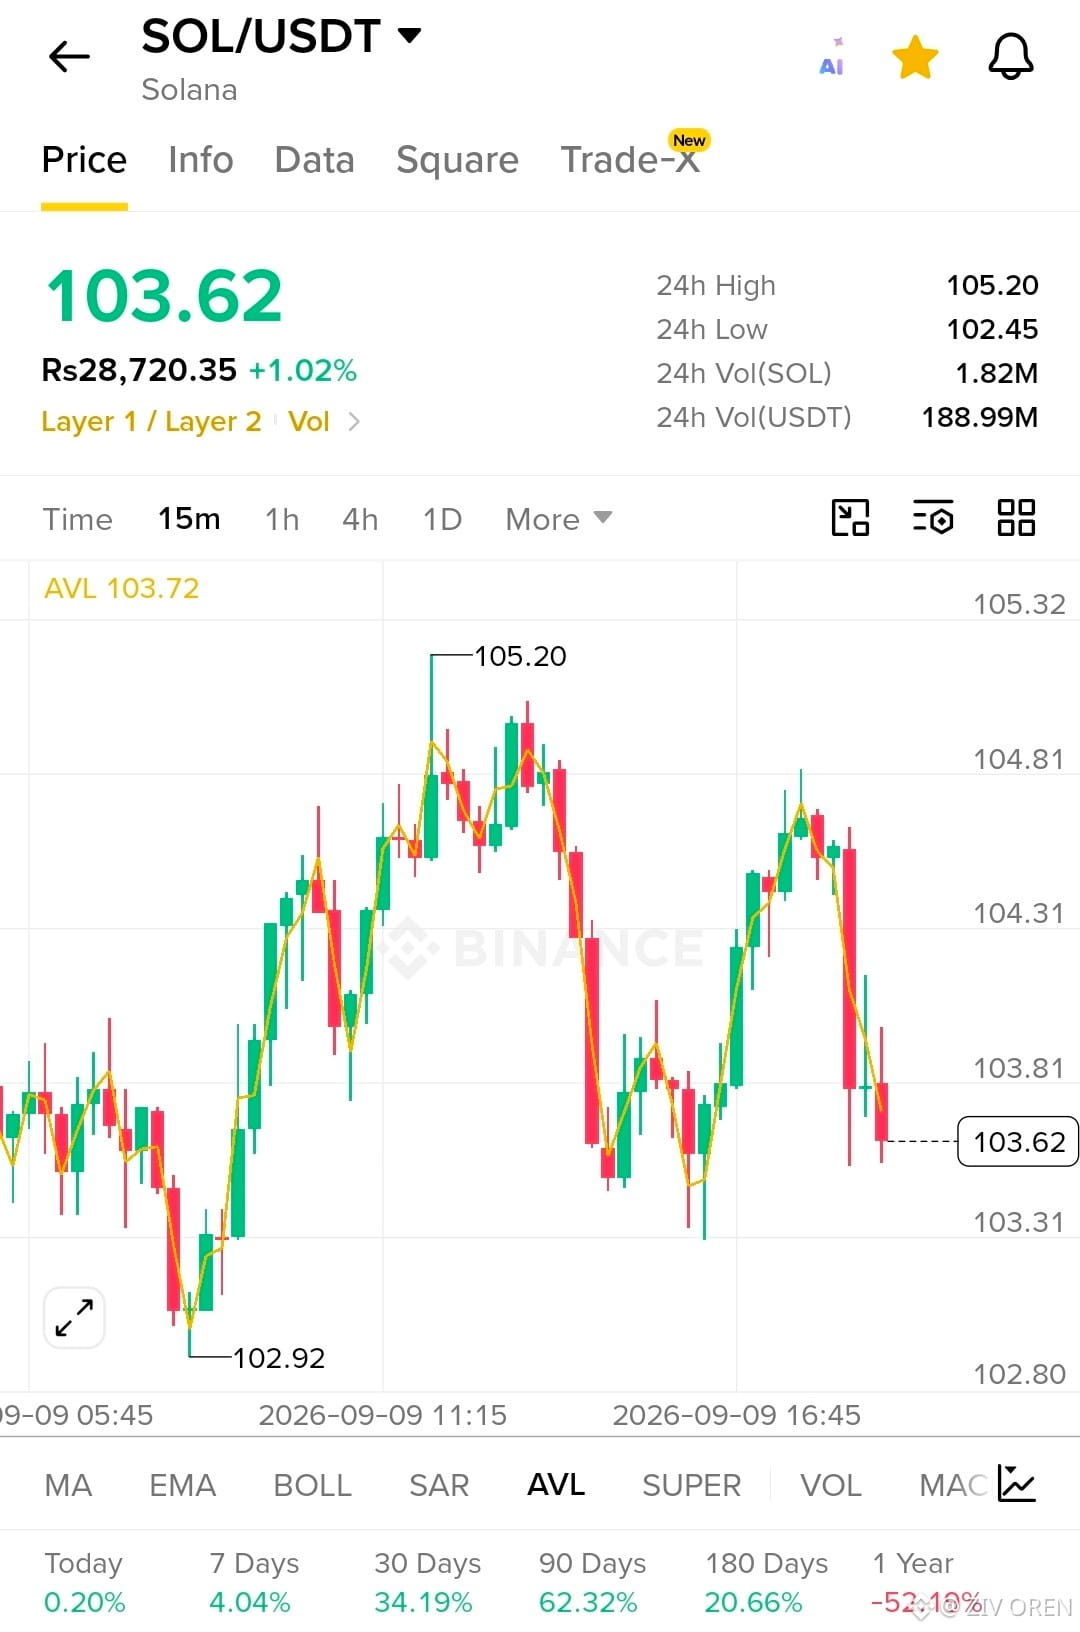

$SOL — BULLISH LONG SETUP $
Entry Zone: 103.45 – 103.70
TP1: 104.00
TP2: 104.35
TP3: 104.80
Stop Loss: 103.15
Analysis:
SOL is holding above the 103.30 support area after a sharp pullback from the 104.80 region. On the 15M chart, price is attempting to stabilize, while 103.80–104.00 remains the key recovery zone.
A clean reclaim and hold above 104.00 could strengthen the bullish structure and open the way toward 104.35 and 104.80. If 103.30 breaks with strong selling pressure, this long setup becomes weaker and the trade should be avoided.
Trade Plan:
Wait for confirmation rather than chasing the move. Consider protecting partial profits at TP1 and moving the stop toward entry if momentum continues.
High-volatility setup — manage position size and risk carefully. Levels are chart-based and not guaranteed.
$ SOL — Stay Focused, Trade Smart $SOL
Entry Zone: 103.45 – 103.70
TP1: 104.00
TP2: 104.35
TP3: 104.80
Stop Loss: 103.15
Analysis:
SOL is holding above the 103.30 support area after a sharp pullback from the 104.80 region. On the 15M chart, price is attempting to stabilize, while 103.80–104.00 remains the key recovery zone.
A clean reclaim and hold above 104.00 could strengthen the bullish structure and open the way toward 104.35 and 104.80. If 103.30 breaks with strong selling pressure, this long setup becomes weaker and the trade should be avoided.
Trade Plan:
Wait for confirmation rather than chasing the move. Consider protecting partial profits at TP1 and moving the stop toward entry if momentum continues.
High-volatility setup — manage position size and risk carefully. Levels are chart-based and not guaranteed.
$ SOL — Stay Focused, Trade Smart $SOL