

#bnf
bnf
6,966 views
21 Discussing
Hot
Latest

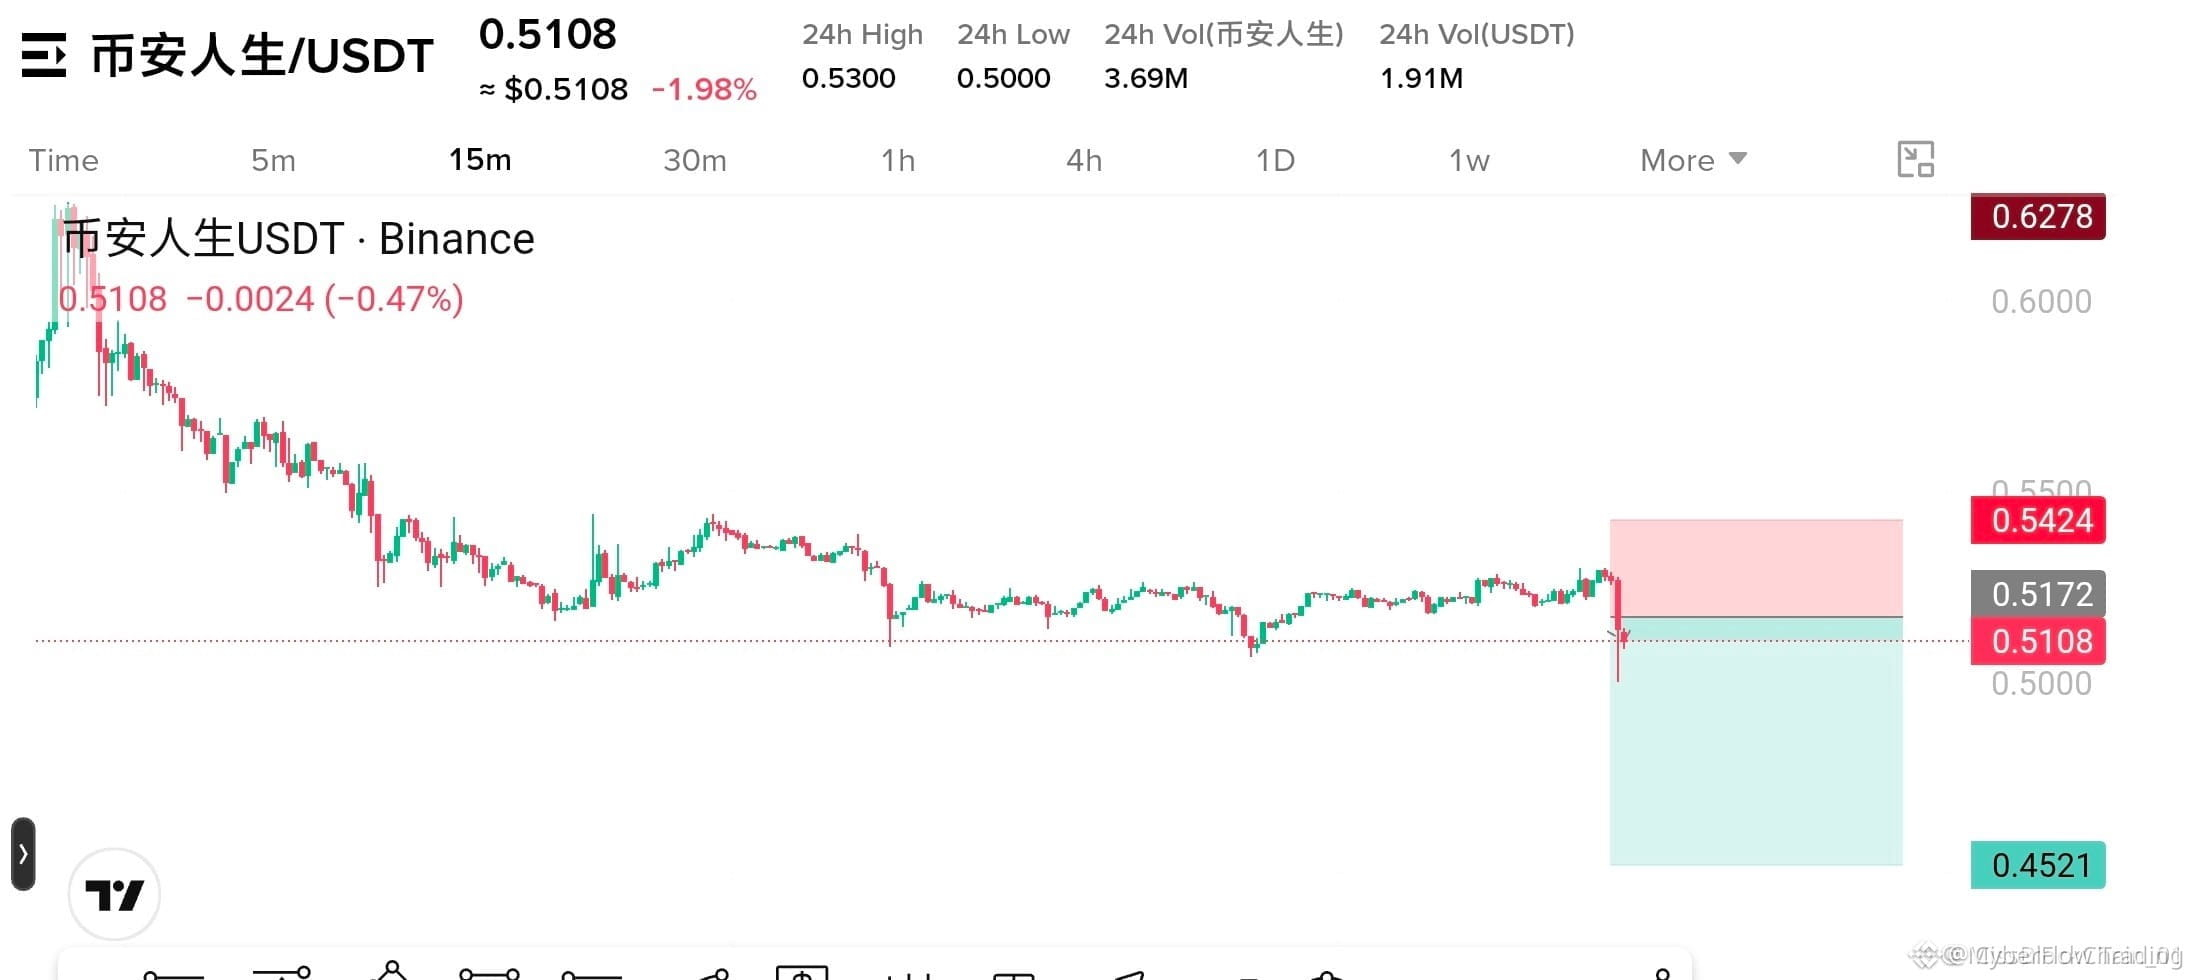
🚨 $BNF PLUNGES BELOW $0.5172 – BEARISH SWEEP IN PLAY! 🐻
Entry: 0.510-0.517 ⚡
Target: 0.500 🚀
Target: 0.480 🚀
Target: 0.452 🚀
Stop Loss: 0.542 ⚠️
Liquidity is flushing out under $0.5172, and the bears are grabbing the reins. The order block at $0.517 turned into a hard reject, forcing the market into the $0.510‑$0.517 entry corridor. 📊
Every tick below $0.500 fuels the down‑trend, with the next liquidity bucket at $0.452 waiting to soak up any stray longs. Volume spikes confirm the sell‑side aggression, and the RSI is diving into bearish territory. 🦈
💬 Are you ready to ride the bearish wave or waiting for a reversal bounce? 👇
⚠️ Not financial advice. Always manage your risk. 🛡️
🏷️ #BNF #ShortSetup #Bearish #Crypto
🔥 🐻
🚨 $BNF PLUNGES BELOW $0.5172 – BEARISH SWEEP IN PLAY! 🐻
Entry: 0.510-0.517 ⚡
Target: 0.500 🚀
Target: 0.480 🚀
Target: 0.452 🚀
Stop Loss: 0.542 ⚠️
Liquidity is flushing out under $0.5172, and the bears are grabbing the reins. The order block at $0.517 turned into a hard reject, forcing the market into the $0.510‑$0.517 entry corridor. 📊
Every tick below $0.500 fuels the down‑trend, with the next liquidity bucket at $0.452 waiting to soak up any stray longs. Volume spikes confirm the sell‑side aggression, and the RSI is diving into bearish territory. 🦈
💬 Are you ready to ride the bearish wave or waiting for a reversal bounce? 👇
⚠️ Not financial advice. Always manage your risk. 🛡️
🏷️ #BNF #ShortSetup #Bearish #Crypto
🔥 🐻
Entry: 0.510-0.517 ⚡
Target: 0.500 🚀
Target: 0.480 🚀
Target: 0.452 🚀
Stop Loss: 0.542 ⚠️
Liquidity is flushing out under $0.5172, and the bears are grabbing the reins. The order block at $0.517 turned into a hard reject, forcing the market into the $0.510‑$0.517 entry corridor. 📊
Every tick below $0.500 fuels the down‑trend, with the next liquidity bucket at $0.452 waiting to soak up any stray longs. Volume spikes confirm the sell‑side aggression, and the RSI is diving into bearish territory. 🦈
💬 Are you ready to ride the bearish wave or waiting for a reversal bounce? 👇
⚠️ Not financial advice. Always manage your risk. 🛡️
🏷️ #BNF #ShortSetup #Bearish #Crypto
🔥 🐻
16

·
--
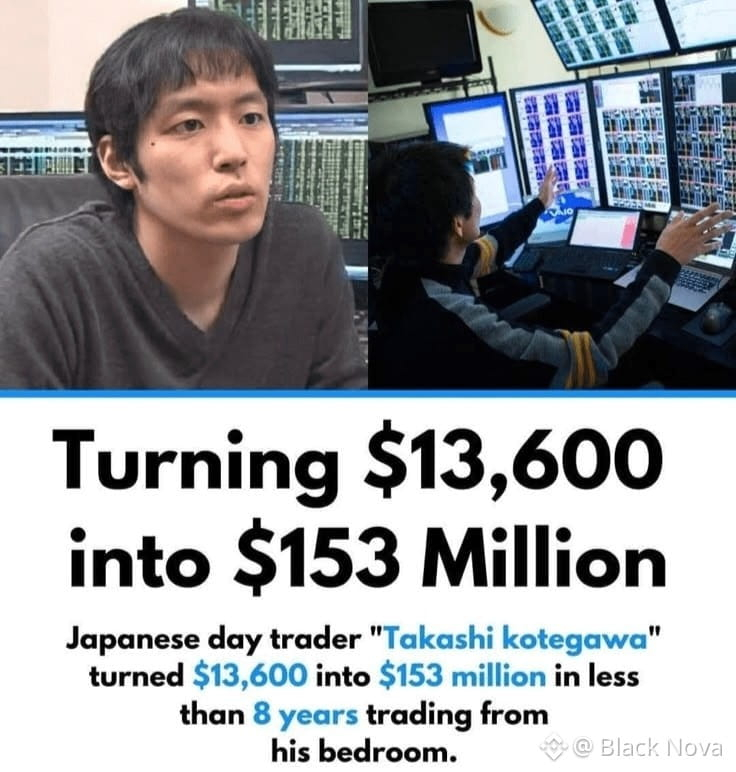
🔥 $BTC Long Setup (BNF Style) 📈
$BTC
{future}(BTCUSDT)
🟢 Direction: Cautiously Long
💰 Entry Zone: 66,000–67,000
🎯 TP1: 69,500 (Take some profit off the table)
🎯 TP2: 72,000
🎯 TP3: 78,000 (Hold if the trend continues)
🛑 Stop Loss: 63,800
📊 Logic:
• Daily chart shows a strong rebound from 59K
• EMA7 has reclaimed position below the price
• EMA25 and EMA99 remain overhead resistance
• Currently in a corrective rebound, avoid chasing highs
🧠 BNF Risk Management:
• Max loss of $3–5 per $100 in the account
• Leverage 1–2x
• After reaching TP1 → Move stop loss to entry price
• No adding to positions, don’t go all-in
⚠️ Capital first, compounding second, profits third
#BTC #Long #Crypto #BNF #Trading #DYOR
🔥 $BTC Long Setup (BNF Style) 📈
$BTC
🟢 Direction: Cautiously Long
💰 Entry Zone: 66,000–67,000
🎯 TP1: 69,500 (Take some profit off the table)
🎯 TP2: 72,000
🎯 TP3: 78,000 (Hold if the trend continues)
🛑 Stop Loss: 63,800
📊 Logic:
• Daily chart shows a strong rebound from 59K
• EMA7 has reclaimed position below the price
• EMA25 and EMA99 remain overhead resistance
• Currently in a corrective rebound, avoid chasing highs
🧠 BNF Risk Management:
• Max loss of $3–5 per $100 in the account
• Leverage 1–2x
• After reaching TP1 → Move stop loss to entry price
• No adding to positions, don’t go all-in
⚠️ Capital first, compounding second, profits third
#BTC #Long #Crypto #BNF #Trading #DYOR
$BTC
🟢 Direction: Cautiously Long
💰 Entry Zone: 66,000–67,000
🎯 TP1: 69,500 (Take some profit off the table)
🎯 TP2: 72,000
🎯 TP3: 78,000 (Hold if the trend continues)
🛑 Stop Loss: 63,800
📊 Logic:
• Daily chart shows a strong rebound from 59K
• EMA7 has reclaimed position below the price
• EMA25 and EMA99 remain overhead resistance
• Currently in a corrective rebound, avoid chasing highs
🧠 BNF Risk Management:
• Max loss of $3–5 per $100 in the account
• Leverage 1–2x
• After reaching TP1 → Move stop loss to entry price
• No adding to positions, don’t go all-in
⚠️ Capital first, compounding second, profits third
#BTC #Long #Crypto #BNF #Trading #DYOR
1
187

·
--
Bullish
XRP — $100 Challenge Plan (BNF Style) 📈
$XRP
XRPUSDT
Perp
1.2258
+3.11%
💰 Initial Capital: $100
🟢 Position Size: $40–$60 (don't go all in)
📍 Entry Zone: 1.24–1.28
⚡ Leverage: 2×–3×
🎯 TP1: 1.35
🎯 TP2: 1.45
🎯 TP3: 1.60
🛑 Hard Stop-Loss: 1.15
📉 Risk (calculated on total funds):
❌ Stop-loss Trigger ≈ Lose $2–5
✅ TP1 ≈ Gain $4–8
✅ TP2 ≈ Gain $8–15
✅ TP3 ≈ Gain $15–25+
📊 Chart Analysis:
• Daily chart bouncing from 1.05
• Has reclaimed EMA7, close to EMA25
• Avoid chasing highs, wait for a pullback for better stability
🧠 The goal isn't:
$100 → $1000 in one trade
The goal is:
100 → 110 → 125 → 145 → 170 → Slowly compounding
#XRP #long #BNF #Crypto #DYOR
XRP — $100 Challenge Plan (BNF Style) 📈
$XRP
XRPUSDT
Perp
1.2258
+3.11%
💰 Initial Capital: $100
🟢 Position Size: $40–$60 (don't go all in)
📍 Entry Zone: 1.24–1.28
⚡ Leverage: 2×–3×
🎯 TP1: 1.35
🎯 TP2: 1.45
🎯 TP3: 1.60
🛑 Hard Stop-Loss: 1.15
📉 Risk (calculated on total funds):
❌ Stop-loss Trigger ≈ Lose $2–5
✅ TP1 ≈ Gain $4–8
✅ TP2 ≈ Gain $8–15
✅ TP3 ≈ Gain $15–25+
📊 Chart Analysis:
• Daily chart bouncing from 1.05
• Has reclaimed EMA7, close to EMA25
• Avoid chasing highs, wait for a pullback for better stability
🧠 The goal isn't:
$100 → $1000 in one trade
The goal is:
100 → 110 → 125 → 145 → 170 → Slowly compounding
#XRP #long #BNF #Crypto #DYOR
$XRP
XRPUSDT
Perp
1.2258
+3.11%
💰 Initial Capital: $100
🟢 Position Size: $40–$60 (don't go all in)
📍 Entry Zone: 1.24–1.28
⚡ Leverage: 2×–3×
🎯 TP1: 1.35
🎯 TP2: 1.45
🎯 TP3: 1.60
🛑 Hard Stop-Loss: 1.15
📉 Risk (calculated on total funds):
❌ Stop-loss Trigger ≈ Lose $2–5
✅ TP1 ≈ Gain $4–8
✅ TP2 ≈ Gain $8–15
✅ TP3 ≈ Gain $15–25+
📊 Chart Analysis:
• Daily chart bouncing from 1.05
• Has reclaimed EMA7, close to EMA25
• Avoid chasing highs, wait for a pullback for better stability
🧠 The goal isn't:
$100 → $1000 in one trade
The goal is:
100 → 110 → 125 → 145 → 170 → Slowly compounding
#XRP #long #BNF #Crypto #DYOR

118
·
--
🔥 XRP — $100 Challenge Plan (BNF Style) 📈
$XRP
{future}(XRPUSDT)
💰 Initial Capital: $100
🟢 Position Size: $40–$60 (don't go all in)
📍 Entry Zone: 1.24–1.28
⚡ Leverage: 2×–3×
🎯 TP1: 1.35
🎯 TP2: 1.45
🎯 TP3: 1.60
🛑 Hard Stop-Loss: 1.15
📉 Risk (calculated on total funds):
❌ Stop-loss Trigger ≈ Lose $2–5
✅ TP1 ≈ Gain $4–8
✅ TP2 ≈ Gain $8–15
✅ TP3 ≈ Gain $15–25+
📊 Chart Analysis:
• Daily chart bouncing from 1.05
• Has reclaimed EMA7, close to EMA25
• Avoid chasing highs, wait for a pullback for better stability
🧠 The goal isn't:
$100 → $1000 in one trade
The goal is:
100 → 110 → 125 → 145 → 170 → Slowly compounding
#XRP #LONG #BNF #Crypto #DYOR
🔥 XRP — $100 Challenge Plan (BNF Style) 📈
$XRP
💰 Initial Capital: $100
🟢 Position Size: $40–$60 (don't go all in)
📍 Entry Zone: 1.24–1.28
⚡ Leverage: 2×–3×
🎯 TP1: 1.35
🎯 TP2: 1.45
🎯 TP3: 1.60
🛑 Hard Stop-Loss: 1.15
📉 Risk (calculated on total funds):
❌ Stop-loss Trigger ≈ Lose $2–5
✅ TP1 ≈ Gain $4–8
✅ TP2 ≈ Gain $8–15
✅ TP3 ≈ Gain $15–25+
📊 Chart Analysis:
• Daily chart bouncing from 1.05
• Has reclaimed EMA7, close to EMA25
• Avoid chasing highs, wait for a pullback for better stability
🧠 The goal isn't:
$100 → $1000 in one trade
The goal is:
100 → 110 → 125 → 145 → 170 → Slowly compounding
#XRP #LONG #BNF #Crypto #DYOR
$XRP
💰 Initial Capital: $100
🟢 Position Size: $40–$60 (don't go all in)
📍 Entry Zone: 1.24–1.28
⚡ Leverage: 2×–3×
🎯 TP1: 1.35
🎯 TP2: 1.45
🎯 TP3: 1.60
🛑 Hard Stop-Loss: 1.15
📉 Risk (calculated on total funds):
❌ Stop-loss Trigger ≈ Lose $2–5
✅ TP1 ≈ Gain $4–8
✅ TP2 ≈ Gain $8–15
✅ TP3 ≈ Gain $15–25+
📊 Chart Analysis:
• Daily chart bouncing from 1.05
• Has reclaimed EMA7, close to EMA25
• Avoid chasing highs, wait for a pullback for better stability
🧠 The goal isn't:
$100 → $1000 in one trade
The goal is:
100 → 110 → 125 → 145 → 170 → Slowly compounding
#XRP #LONG #BNF #Crypto #DYOR

1
226
·
--
Bullish
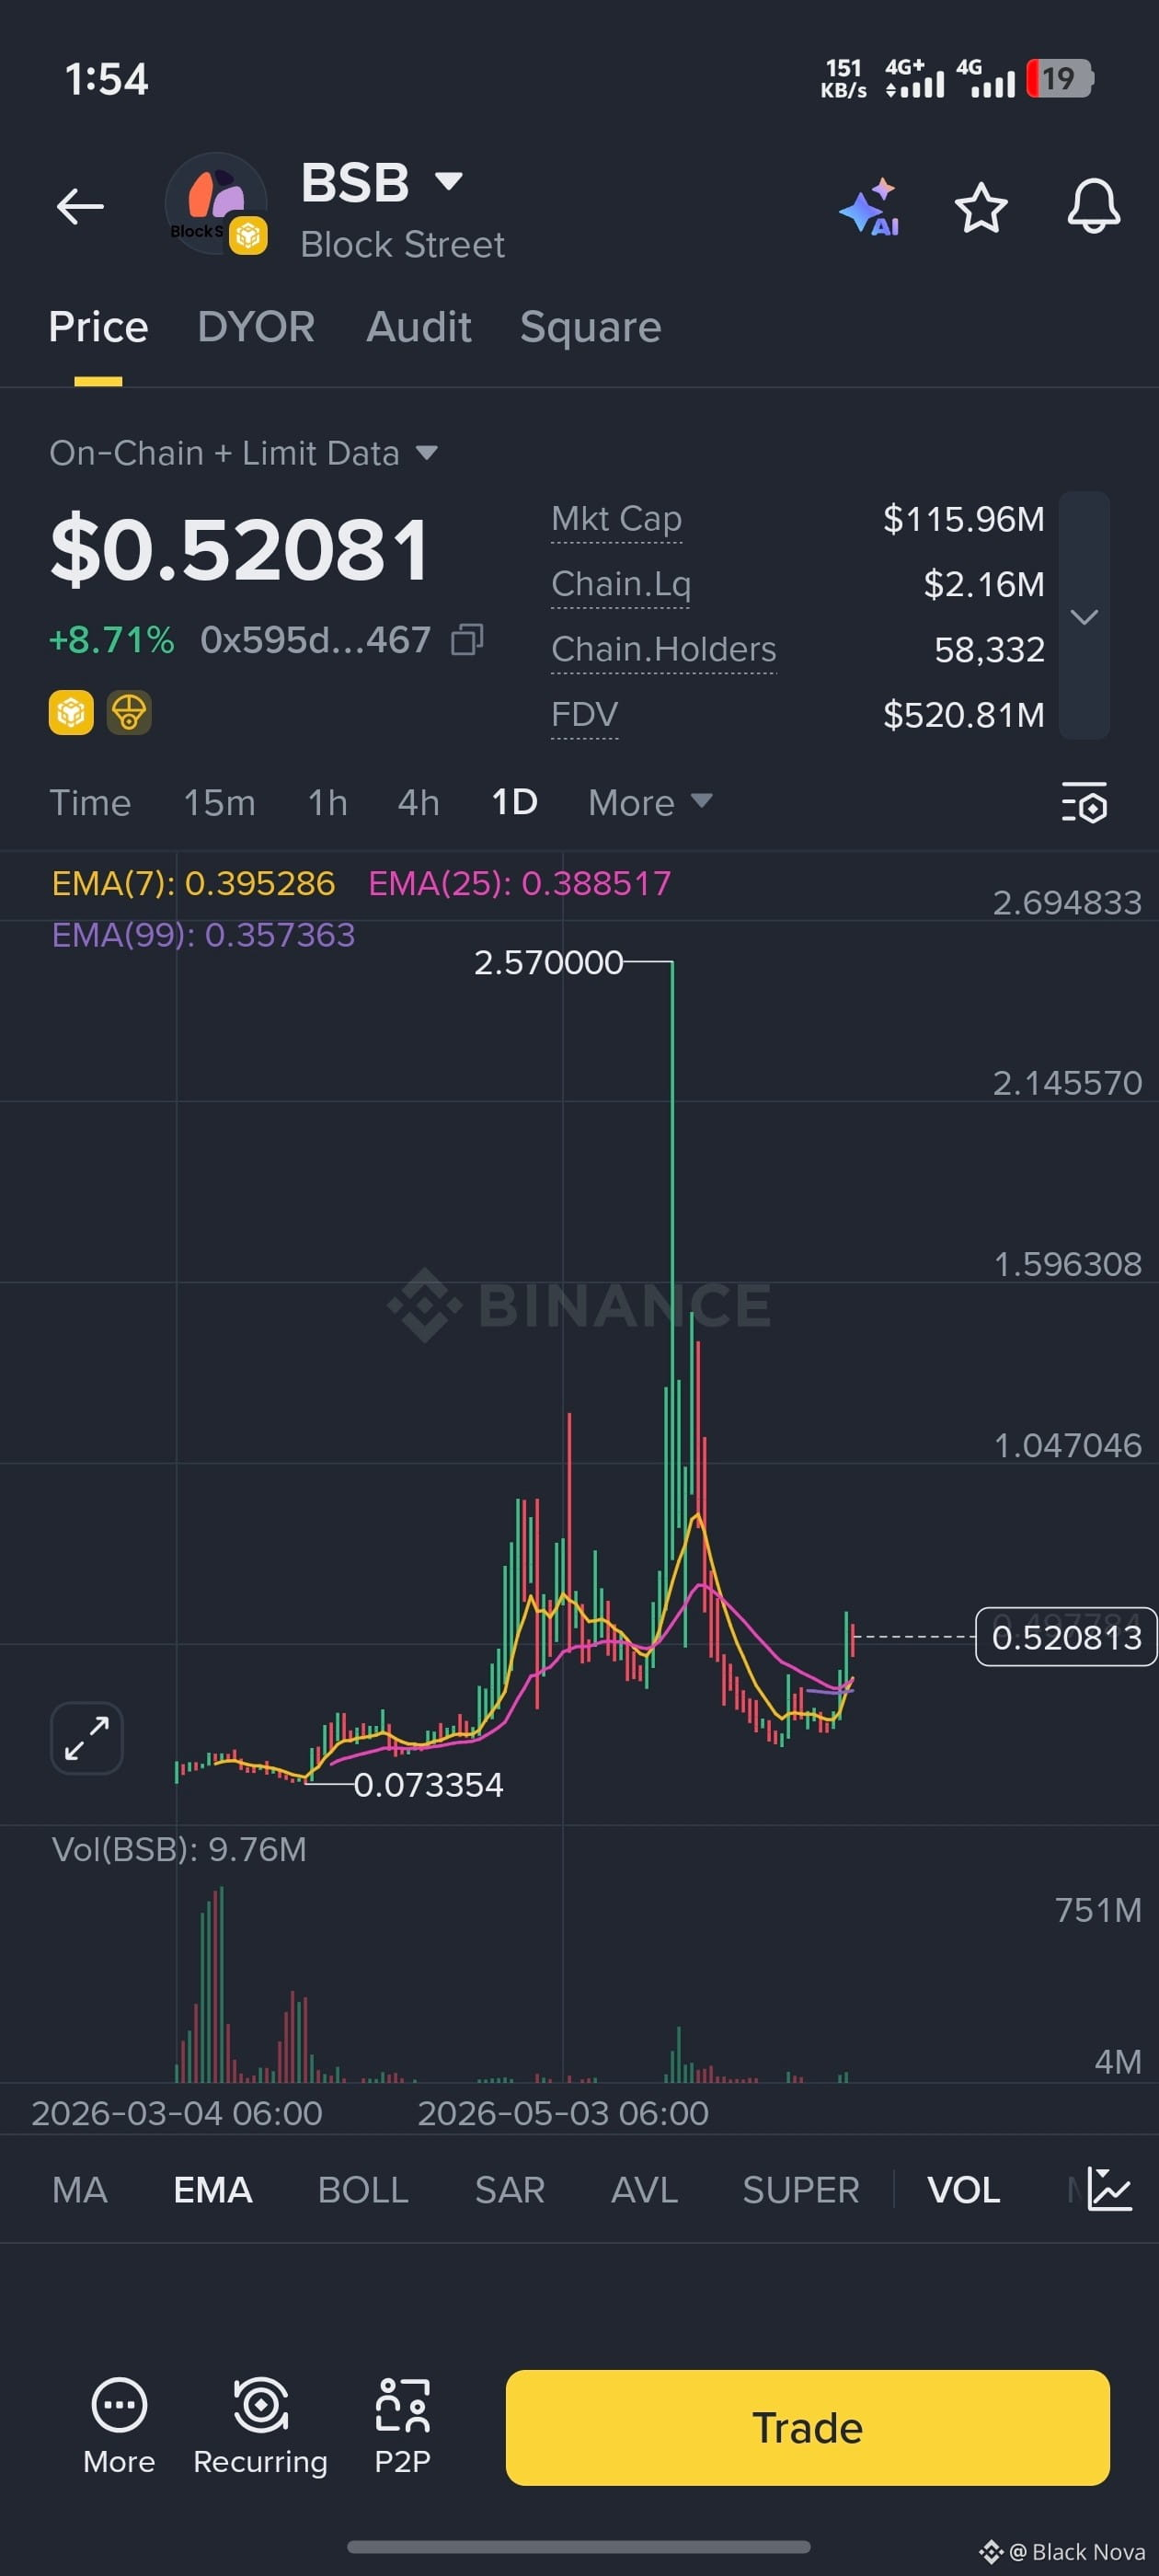
🔥 $BSB — $100 Challenge Plan (BNF Style)📈
⚠️ The chart indicates high volatility coins, so manage your risk first.
💰 Principal: 100 USD
🟢 Position: 40–50 USD
📍 Entry Zone: 0.48–0.52
⚡ Leverage: 2× (max 3×)
🎯 TP1: 0.62
🎯 TP2: 0.78
🎯 TP3: 0.95
🛑 Hard Stop-Loss: 0.43
📉 Risk (based on total capital):
❌ Stop-Loss ≈ lose $2–5
✅ TP1 ≈ gain $6–10
✅ TP2 ≈ gain $10–18
✅ TP3 ≈ gain $18–30+
📊 Chart Sentiment:
• EMA7 > EMA25 > EMA99 → Short-term bullish
• A rebound has occurred, chasing highs is not recommended
• Wait for a pullback confirmation for more stability
🧠 BNF Rules:
Preserve capital > Capture trends > Amplify profits > No averaging down while holding
#BSB #LONG #Crypto #BNF #DYOR
🔥 $BSB — $100 Challenge Plan (BNF Style)📈
⚠️ The chart indicates high volatility coins, so manage your risk first.
💰 Principal: 100 USD
🟢 Position: 40–50 USD
📍 Entry Zone: 0.48–0.52
⚡ Leverage: 2× (max 3×)
🎯 TP1: 0.62
🎯 TP2: 0.78
🎯 TP3: 0.95
🛑 Hard Stop-Loss: 0.43
📉 Risk (based on total capital):
❌ Stop-Loss ≈ lose $2–5
✅ TP1 ≈ gain $6–10
✅ TP2 ≈ gain $10–18
✅ TP3 ≈ gain $18–30+
📊 Chart Sentiment:
• EMA7 > EMA25 > EMA99 → Short-term bullish
• A rebound has occurred, chasing highs is not recommended
• Wait for a pullback confirmation for more stability
🧠 BNF Rules:
Preserve capital > Capture trends > Amplify profits > No averaging down while holding
#BSB #LONG #Crypto #BNF #DYOR
⚠️ The chart indicates high volatility coins, so manage your risk first.
💰 Principal: 100 USD
🟢 Position: 40–50 USD
📍 Entry Zone: 0.48–0.52
⚡ Leverage: 2× (max 3×)
🎯 TP1: 0.62
🎯 TP2: 0.78
🎯 TP3: 0.95
🛑 Hard Stop-Loss: 0.43
📉 Risk (based on total capital):
❌ Stop-Loss ≈ lose $2–5
✅ TP1 ≈ gain $6–10
✅ TP2 ≈ gain $10–18
✅ TP3 ≈ gain $18–30+
📊 Chart Sentiment:
• EMA7 > EMA25 > EMA99 → Short-term bullish
• A rebound has occurred, chasing highs is not recommended
• Wait for a pullback confirmation for more stability
🧠 BNF Rules:
Preserve capital > Capture trends > Amplify profits > No averaging down while holding
#BSB #LONG #Crypto #BNF #DYOR

266
Log in to explore more content
Join global crypto users on Binance Square
⚡️ Get latest and useful information about crypto.
💬 Trusted by the world’s largest crypto exchange.
👍 Discover real insights from verified creators.
Email / Phone number
Trending Topics
1
#EarningsSeason
47,809 views
442 Discussing
2
#JapanFSABacksFourthStablecoinTradeSettlementPilot
522 views
57 Discussing
3
#BitgetHackerFailsToMoveStolenFunds
4,877 views
192 Discussing
4
#BitMineETHHoldingsTop6Million
8,092 views
363 Discussing
5
#StrategyAdds1666BTCHoldingsReach847666
7,481 views
267 Discussing
6
#NvidiaApproves$150BBuyback
3,013 views
59 Discussing
7
#OpenAIDelaysGPT6.1OverSafetyIssues
19,528 views
582 Discussing
8
#AMDToAcquireWorldLabsFor$8.2B
1,518 views
50 Discussing
9
#AnthropicIPOProspectusCouldValueItOver$2T
5,037 views
74 Discussing
10
#HackersDrainOver12.4MXRPFromDCENTWallets
35,909 views
667 Discussing