
TradeWithYota
1.9k Posts

TradeWithYota
Full-Time Trader & Analyst | Crypto & Gold (XAU) | Verified News • Macro Insights • Futures Signals | BTC • ETH •ALTCOINS •XAU & XAG |NO HYPE JUST REAL INSIGHTS
Open Trade
High-Frequency Trader
2.4 Years
12 Following
294 Followers
1.2K+ Liked
Posts
Portfolio
All
Quotes
Videos
Live
PINNED
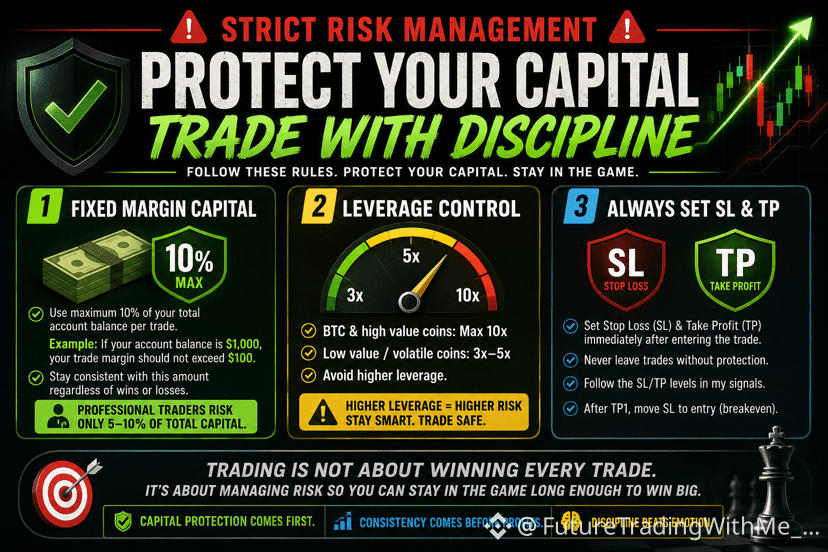
⚠️ Strict Risk Management Rules for Future Trade Signals
If you plan to follow my future trade signals, strict risk management is mandatory. 🚨
Market volatility can create panic, emotional decisions, and unnecessary losses. These rules are designed to help protect your capital, control risk, and maintain consistency over the long term.
1️⃣ Fixed Margin Capital
Use a maximum of 10% of your total account balance as margin per trade.
Example:
If your account balance is $1,000, your maximum margin per trade should be $100.
Keep your position size consistent and do not increase your margin simply because you are on a winning or losing streak.
2️⃣ Leverage Control
Use leverage according to the volatility and value of the asset:
* BTC & major/high-value coins: Maximum 10x
* Lower-value or more volatile coins: Prefer 3x–5x
* Avoid excessive leverage, as it significantly increases liquidation risk and emotional pressure.
Higher leverage does not mean higher-quality trades. Proper risk management comes first.
3️⃣ Always Set SL & TP
Immediately set your Stop Loss (SL) and Take Profit (TP) after entering a trade.
* Never leave a position unprotected.
* Follow the SL/TP levels provided with my signals.
* Once TP1 is reached, move your SL to the entry price (breakeven) whenever instructed.
This helps protect your capital while allowing the trade to continue toward the remaining targets.
📊 Final Advice
Trading is not about winning every trade.
Some trades will hit SL — and that is completely normal. What matters is managing your risk properly so that a few losing trades do not damage your overall account.
Remember:
🛡️ Capital protection comes first.
📈 Consistency comes before profits.
🧠 Discipline beats emotion.
Follow the rules, manage your risk, and never trade with money you cannot afford to lose.
Trade smart. Protect your capital. Stay disciplined. 🚨
#FutureTradingSignals #trading #cryptotrader #crypto
If you plan to follow my future trade signals, strict risk management is mandatory. 🚨
Market volatility can create panic, emotional decisions, and unnecessary losses. These rules are designed to help protect your capital, control risk, and maintain consistency over the long term.
1️⃣ Fixed Margin Capital
Use a maximum of 10% of your total account balance as margin per trade.
Example:
If your account balance is $1,000, your maximum margin per trade should be $100.
Keep your position size consistent and do not increase your margin simply because you are on a winning or losing streak.
2️⃣ Leverage Control
Use leverage according to the volatility and value of the asset:
* BTC & major/high-value coins: Maximum 10x
* Lower-value or more volatile coins: Prefer 3x–5x
* Avoid excessive leverage, as it significantly increases liquidation risk and emotional pressure.
Higher leverage does not mean higher-quality trades. Proper risk management comes first.
3️⃣ Always Set SL & TP
Immediately set your Stop Loss (SL) and Take Profit (TP) after entering a trade.
* Never leave a position unprotected.
* Follow the SL/TP levels provided with my signals.
* Once TP1 is reached, move your SL to the entry price (breakeven) whenever instructed.
This helps protect your capital while allowing the trade to continue toward the remaining targets.
📊 Final Advice
Trading is not about winning every trade.
Some trades will hit SL — and that is completely normal. What matters is managing your risk properly so that a few losing trades do not damage your overall account.
Remember:
🛡️ Capital protection comes first.
📈 Consistency comes before profits.
🧠 Discipline beats emotion.
Follow the rules, manage your risk, and never trade with money you cannot afford to lose.
Trade smart. Protect your capital. Stay disciplined. 🚨
#FutureTradingSignals #trading #cryptotrader #crypto
$ASTER — LONG 🟢
🔥 High-Potential Trade Setup
💰 Entry: $0.7006
📈 Higher Time Frame: Bullish ✅
🚀 Momentum: Strong ✅
🎯 TP1: $0.7150
🎯 TP2: $0.7300
🎯 TP3: $0.7500
🛑 Stop Loss: $0.6820
Reasoning:
• Higher-timeframe structure remains bullish
• Strong momentum supports continuation
• $0.7000 acts as an important psychological support zone
• Targets are positioned around potential resistance areas
⚠️ Use controlled leverage and manage risk.
Trade with Yota.
#asterix
🔥 High-Potential Trade Setup
💰 Entry: $0.7006
📈 Higher Time Frame: Bullish ✅
🚀 Momentum: Strong ✅
🎯 TP1: $0.7150
🎯 TP2: $0.7300
🎯 TP3: $0.7500
🛑 Stop Loss: $0.6820
Reasoning:
• Higher-timeframe structure remains bullish
• Strong momentum supports continuation
• $0.7000 acts as an important psychological support zone
• Targets are positioned around potential resistance areas
⚠️ Use controlled leverage and manage risk.
Trade with Yota.
#asterix
🎯 $TST — LONG 🟢
🔥 High-Potential Setup
Entry: $0.0176
Stop Loss: $0.0165
TP1: $0.0188
TP2: $0.0202
TP3: $0.0220
📊 Technical Outlook
• High Time Frame: Bullish ✅
• Momentum: Strong ✅
• Structure: Bullish continuation setup
• Risk/Reward: Favorable with defined invalidation
🎯 Trade Plan: Secure partial profits at each target. After TP1, consider moving SL to breakeven to protect capital.
⚠️ Use low leverage and manage risk. Never risk more than you can afford to lose.
Trade with Yota 🚀
#TST
🔥 High-Potential Setup
Entry: $0.0176
Stop Loss: $0.0165
TP1: $0.0188
TP2: $0.0202
TP3: $0.0220
📊 Technical Outlook
• High Time Frame: Bullish ✅
• Momentum: Strong ✅
• Structure: Bullish continuation setup
• Risk/Reward: Favorable with defined invalidation
🎯 Trade Plan: Secure partial profits at each target. After TP1, consider moving SL to breakeven to protect capital.
⚠️ Use low leverage and manage risk. Never risk more than you can afford to lose.
Trade with Yota 🚀
#TST
$XPL — SHORT 🔴
High-Potential Short Setup
💰 Entry: $0.0830
🛑 Stop Loss: $0.0870
🎯 TP1: $0.0795
🎯 TP2: $0.0755
🎯 TP3: $0.0710
🎯 TP4: $0.0660
Why Short?
* Higher-timeframe structure remains bearish.
* Strong downside momentum favors sellers.
* The setup targets successive support zones as price continues lower.
* Failure to reclaim the entry/resistance area would strengthen the bearish continuation thesis.
⚠️ Risk Management: Use low leverage and secure partial profits at each TP. Consider moving SL to entry after TP1.
Trade with Yota 🚀
#XPL #TradeWithYota
High-Potential Short Setup
💰 Entry: $0.0830
🛑 Stop Loss: $0.0870
🎯 TP1: $0.0795
🎯 TP2: $0.0755
🎯 TP3: $0.0710
🎯 TP4: $0.0660
Why Short?
* Higher-timeframe structure remains bearish.
* Strong downside momentum favors sellers.
* The setup targets successive support zones as price continues lower.
* Failure to reclaim the entry/resistance area would strengthen the bearish continuation thesis.
⚠️ Risk Management: Use low leverage and secure partial profits at each TP. Consider moving SL to entry after TP1.
Trade with Yota 🚀
#XPL #TradeWithYota
$ICP — LONG 🟢
High-Potential Long Setup
💰 Entry: $2.448
🛑 Stop Loss: $2.330
🎯 TP1: $2.550
🎯 TP2: $2.680
🎯 TP3: $2.850
🎯 TP4: $3.050
Why Long?
* Higher-timeframe structure remains bullish.
* Strong momentum suggests buyers are maintaining control.
* Entry offers a favorable risk-to-reward setup toward the next resistance zones.
* A clean hold above the entry area could open the way toward higher targets.
⚠️ Risk Management: Use low leverage and never risk more than you can afford to lose. Consider moving SL to entry after TP1.
Trade with Yota 🚀
#icp #TradeWithYota
High-Potential Long Setup
💰 Entry: $2.448
🛑 Stop Loss: $2.330
🎯 TP1: $2.550
🎯 TP2: $2.680
🎯 TP3: $2.850
🎯 TP4: $3.050
Why Long?
* Higher-timeframe structure remains bullish.
* Strong momentum suggests buyers are maintaining control.
* Entry offers a favorable risk-to-reward setup toward the next resistance zones.
* A clean hold above the entry area could open the way toward higher targets.
⚠️ Risk Management: Use low leverage and never risk more than you can afford to lose. Consider moving SL to entry after TP1.
Trade with Yota 🚀
#icp #TradeWithYota
🟢 $BLESS — LONG
High-Potential Long Setup
💰 Entry: $0.0122
🛑 Stop Loss: $0.0110
🎯 Take Profits:
* TP1: $0.0130
* TP2: $0.0138
* TP3: $0.0150
* TP4: $0.0170
Why LONG?
* Higher-timeframe trend is bullish 📈
* Momentum remains strong.
* Price is positioned for a potential continuation if buyers maintain control.
* Breakout and follow-through could accelerate the move toward the higher targets.
⚠️ Risk Management: Keep leverage low, avoid overexposure, and secure partial profits as targets are reached.
#Bless #TradeWithYota
Trade with Yota 🚀
High-Potential Long Setup
💰 Entry: $0.0122
🛑 Stop Loss: $0.0110
🎯 Take Profits:
* TP1: $0.0130
* TP2: $0.0138
* TP3: $0.0150
* TP4: $0.0170
Why LONG?
* Higher-timeframe trend is bullish 📈
* Momentum remains strong.
* Price is positioned for a potential continuation if buyers maintain control.
* Breakout and follow-through could accelerate the move toward the higher targets.
⚠️ Risk Management: Keep leverage low, avoid overexposure, and secure partial profits as targets are reached.
#Bless #TradeWithYota
Trade with Yota 🚀
🟢 $COTI — LONG
High-Potential Long Setup
💰 Entry: $0.0130
🛑 Stop Loss: $0.0118
🎯 Take Profits:
* TP1: $0.0138
* TP2: $0.0146
* TP3: $0.0155
* TP4: $0.0170
Why LONG?
* Higher-timeframe structure remains bullish 📈
* Strong momentum supports continuation.
* Current price offers a favorable risk/reward setup.
* A sustained move above nearby resistance could open the way toward higher targets.
⚠️ Risk Management: Use low leverage and risk only a small portion of your account. Move SL toward breakeven after TP1 if momentum remains strong.
Trade with Yota 🚀
#COTI #TradeWithYota
High-Potential Long Setup
💰 Entry: $0.0130
🛑 Stop Loss: $0.0118
🎯 Take Profits:
* TP1: $0.0138
* TP2: $0.0146
* TP3: $0.0155
* TP4: $0.0170
Why LONG?
* Higher-timeframe structure remains bullish 📈
* Strong momentum supports continuation.
* Current price offers a favorable risk/reward setup.
* A sustained move above nearby resistance could open the way toward higher targets.
⚠️ Risk Management: Use low leverage and risk only a small portion of your account. Move SL toward breakeven after TP1 if momentum remains strong.
Trade with Yota 🚀
#COTI #TradeWithYota
$ADA $ADA — SHORT | LOW LEVERAGE
Setup: Short
Leverage: 3–5× max
Entries:
* Entry 1: $0.200
* Entry 2: $0.210
* Average entry if both fill: $0.205
Stop Loss: $0.220
Take Profits:
* 🎯 TP1: $0.195
* 🎯 TP2: $0.190
* 🎯 TP3: $0.180
* 🎯 TP4: $0.170
Trade Management:
* Take partial profit at each target.
* After TP1, consider moving SL to breakeven ($0.205) if both entries are filled.
* Keep leverage low because the second entry is close to the SL.
Bias: Bearish below $0.220. A sustained move above $0.220 invalidates the short setup.
Setup: Short
Leverage: 3–5× max
Entries:
* Entry 1: $0.200
* Entry 2: $0.210
* Average entry if both fill: $0.205
Stop Loss: $0.220
Take Profits:
* 🎯 TP1: $0.195
* 🎯 TP2: $0.190
* 🎯 TP3: $0.180
* 🎯 TP4: $0.170
Trade Management:
* Take partial profit at each target.
* After TP1, consider moving SL to breakeven ($0.205) if both entries are filled.
* Keep leverage low because the second entry is close to the SL.
Bias: Bearish below $0.220. A sustained move above $0.220 invalidates the short setup.
$EDEN — LONG 🟢
🔥 High-Potential Long Setup
Entry: $0.0737
Bias: Bullish 🟢
High-Timeframe Trend: Bullish ✅
Momentum: Strong ✅
🎯 Take-Profit Targets
* TP1: $0.0765
* TP2: $0.0800
* TP3: $0.0850
* TP4: $0.0900
🛑 Stop Loss: $0.0705
📊 Trade Rationale
• Higher-timeframe structure remains bullish
• Strong momentum supports continuation
• $0.0737 offers a potential continuation entry
• Targets are positioned progressively higher to secure profits
⚠️ Risk Management
Use 5–10x leverage maximum and risk only a small portion of your account. Move SL to breakeven after TP1 and consider taking partial profits at each target.
#EDEN #CryptoTrading #Altcoins #LongSetup #Binance
🔥 High-Potential Long Setup
Entry: $0.0737
Bias: Bullish 🟢
High-Timeframe Trend: Bullish ✅
Momentum: Strong ✅
🎯 Take-Profit Targets
* TP1: $0.0765
* TP2: $0.0800
* TP3: $0.0850
* TP4: $0.0900
🛑 Stop Loss: $0.0705
📊 Trade Rationale
• Higher-timeframe structure remains bullish
• Strong momentum supports continuation
• $0.0737 offers a potential continuation entry
• Targets are positioned progressively higher to secure profits
⚠️ Risk Management
Use 5–10x leverage maximum and risk only a small portion of your account. Move SL to breakeven after TP1 and consider taking partial profits at each target.
#EDEN #CryptoTrading #Altcoins #LongSetup #Binance
🚀 $ADA — LONG 🟢
High-Potential Trade Setup
📍 Entry: $0.215
⚡ Leverage: 5–10x
🎯 Targets
* TP1: $0.220
* TP2: $0.228
* TP3: $0.250
🛑 Stop Loss: $0.200
Trade Logic:
• Bullish momentum supports the long setup
• TP1 offers a quick partial-profit opportunity
• TP2 targets the next upside extension
• TP3 is the higher-risk, higher-reward target
⚠️ Use proper position sizing and set SL immediately. Consider moving SL to entry after TP1 is secured.
TradeWithYota
#ada #TradeWithYota
High-Potential Trade Setup
📍 Entry: $0.215
⚡ Leverage: 5–10x
🎯 Targets
* TP1: $0.220
* TP2: $0.228
* TP3: $0.250
🛑 Stop Loss: $0.200
Trade Logic:
• Bullish momentum supports the long setup
• TP1 offers a quick partial-profit opportunity
• TP2 targets the next upside extension
• TP3 is the higher-risk, higher-reward target
⚠️ Use proper position sizing and set SL immediately. Consider moving SL to entry after TP1 is secured.
TradeWithYota
#ada #TradeWithYota
$BLESS — LONG 🟢
High-Potential Long Setup
💰 Entry: $0.0114
📈 Higher Time Frame: Bullish ✅
🔥 Momentum: Strong ✅
Trade Plan
* 🛑 Stop Loss: $0.0107
* 🎯 TP1: $0.0122
* 🎯 TP2: $0.0130
* 🎯 TP3: $0.0140
* 🚀 TP4: $0.0152
Why LONG?
• Higher-timeframe structure remains bullish
• Strong momentum supports continuation
• Entry offers a favorable risk-to-reward setup
• Key resistance levels provide clear profit targets
⚠️ Manage risk carefully. Do not over-leverage. Move SL to entry after TP1 if momentum remains strong.
#Bless #TradeWithYota
TradeWithYota
High-Potential Long Setup
💰 Entry: $0.0114
📈 Higher Time Frame: Bullish ✅
🔥 Momentum: Strong ✅
Trade Plan
* 🛑 Stop Loss: $0.0107
* 🎯 TP1: $0.0122
* 🎯 TP2: $0.0130
* 🎯 TP3: $0.0140
* 🚀 TP4: $0.0152
Why LONG?
• Higher-timeframe structure remains bullish
• Strong momentum supports continuation
• Entry offers a favorable risk-to-reward setup
• Key resistance levels provide clear profit targets
⚠️ Manage risk carefully. Do not over-leverage. Move SL to entry after TP1 if momentum remains strong.
#Bless #TradeWithYota
TradeWithYota
$TRUMP — LONG 🟢
High-Potential Long Setup
💰 Entry: $2.374
🛑 Stop Loss: $2.245
🎯 TP1: $2.520
🎯 TP2: $2.680
🎯 TP3: $2.850
Technical Bias
• Higher-timeframe structure remains bullish
• Strong momentum supports continuation
• Recent recovery has kept TRUMP among the stronger-performing memecoins (MarketScreener Australia)
• Broader crypto momentum has also improved, providing a supportive market backdrop (Reuters)
📌 Trade Management:
Take partial profit at TP1 and move SL toward breakeven after confirmation. Avoid overleveraging—TRUMP remains highly volatile.
⚠️ Risk Management: Always use a stop loss and risk only a small portion of your account.
TradeWithYota
#TRUMP #DonaldTrump #TradeWithYota
High-Potential Long Setup
💰 Entry: $2.374
🛑 Stop Loss: $2.245
🎯 TP1: $2.520
🎯 TP2: $2.680
🎯 TP3: $2.850
Technical Bias
• Higher-timeframe structure remains bullish
• Strong momentum supports continuation
• Recent recovery has kept TRUMP among the stronger-performing memecoins (MarketScreener Australia)
• Broader crypto momentum has also improved, providing a supportive market backdrop (Reuters)
📌 Trade Management:
Take partial profit at TP1 and move SL toward breakeven after confirmation. Avoid overleveraging—TRUMP remains highly volatile.
⚠️ Risk Management: Always use a stop loss and risk only a small portion of your account.
TradeWithYota
#TRUMP #DonaldTrump #TradeWithYota
$TUT — LONG 🟢
High-Potential Long Setup
💰 Entry: $0.0579
📈 HTF Structure: Bullish
⚡ Momentum: Strong
Trade Levels
* 🛑 Stop Loss: $0.0558
* 🎯 TP1: $0.0605
* 🎯 TP2: $0.0635
* 🎯 TP3: $0.0670
Why LONG?
• Higher-timeframe structure remains bullish
• Strong momentum indicates buyers are in control
• Current price offers a favorable risk-to-reward opportunity
• Targets are positioned around potential resistance/extension zones
Risk Management: Use low leverage and risk only a small portion of your account. Consider moving SL to breakeven after TP1 is reached.
Not financial advice. Trade with a defined stop-loss.
TradeWithYota
#TUT #TradeWithYota
High-Potential Long Setup
💰 Entry: $0.0579
📈 HTF Structure: Bullish
⚡ Momentum: Strong
Trade Levels
* 🛑 Stop Loss: $0.0558
* 🎯 TP1: $0.0605
* 🎯 TP2: $0.0635
* 🎯 TP3: $0.0670
Why LONG?
• Higher-timeframe structure remains bullish
• Strong momentum indicates buyers are in control
• Current price offers a favorable risk-to-reward opportunity
• Targets are positioned around potential resistance/extension zones
Risk Management: Use low leverage and risk only a small portion of your account. Consider moving SL to breakeven after TP1 is reached.
Not financial advice. Trade with a defined stop-loss.
TradeWithYota
#TUT #TradeWithYota
$OP — SHORT 🔴
High-Probability Short Setup
💰 Entry: $0.0957
📉 HTF Structure: Bearish
⚡ Momentum: Strong
Trade Levels
* 🛑 Stop Loss: $0.0982
* 🎯 TP1: $0.0930
* 🎯 TP2: $0.0900
* 🎯 TP3: $0.0865
Why Short?
• Bearish higher-timeframe structure supports the short bias
• Strong momentum suggests sellers remain in control
• A sustained move below nearby support could trigger further downside
• TP levels are aligned with potential lower support areas
Risk Management: Use controlled leverage and risk only a small percentage of your account. Consider moving SL to breakeven after TP1.
Not financial advice. Trade with a defined stop-loss.
#OP
TradeWithYota
High-Probability Short Setup
💰 Entry: $0.0957
📉 HTF Structure: Bearish
⚡ Momentum: Strong
Trade Levels
* 🛑 Stop Loss: $0.0982
* 🎯 TP1: $0.0930
* 🎯 TP2: $0.0900
* 🎯 TP3: $0.0865
Why Short?
• Bearish higher-timeframe structure supports the short bias
• Strong momentum suggests sellers remain in control
• A sustained move below nearby support could trigger further downside
• TP levels are aligned with potential lower support areas
Risk Management: Use controlled leverage and risk only a small percentage of your account. Consider moving SL to breakeven after TP1.
Not financial advice. Trade with a defined stop-loss.
#OP
TradeWithYota
$LTC — SHORT 🔴
High-Probability Short Setup
💰 Entry: $49.560
📉 HTF Structure: Bearish
⚡ Momentum: Strong
Trade Levels
* 🛑 Stop Loss: $50.35
* 🎯 TP1: $48.70
* 🎯 TP2: $47.80
* 🎯 TP3: $46.80
Why Short?
• Higher-timeframe structure remains bearish
• Strong downside momentum favors continuation
• Current price offers a favorable risk-to-reward setup
• Targets are positioned around potential support zones
Risk Management: Keep leverage low and risk only a small portion of your account. Move SL to breakeven after TP1 if momentum continues.
Not financial advice. Trade with a defined stop-loss.
#LTC
TradeWithYota
High-Probability Short Setup
💰 Entry: $49.560
📉 HTF Structure: Bearish
⚡ Momentum: Strong
Trade Levels
* 🛑 Stop Loss: $50.35
* 🎯 TP1: $48.70
* 🎯 TP2: $47.80
* 🎯 TP3: $46.80
Why Short?
• Higher-timeframe structure remains bearish
• Strong downside momentum favors continuation
• Current price offers a favorable risk-to-reward setup
• Targets are positioned around potential support zones
Risk Management: Keep leverage low and risk only a small portion of your account. Move SL to breakeven after TP1 if momentum continues.
Not financial advice. Trade with a defined stop-loss.
#LTC
TradeWithYota
$GRASS — LONG 🟢
Entry: $0.3743
Stop Loss: $0.3570
Take Profit 1: $0.3900
Take Profit 2: $0.4100
Take Profit 3: $0.4350
📊 Trade Rationale
• Higher Time Frame: Bullish structure remains intact.
• Momentum: Strong buying momentum supports continuation.
• Trend: Price is trading with bullish market structure, favoring long positions.
• Risk/Reward: Targets provide a favorable upside relative to the defined stop.
Trade Management:
🔹 Secure partial profits at TP1.
🔹 After TP1, consider moving SL to breakeven.
🔹 Avoid over-leveraging; risk only a small portion of your account.
⚠️ Not financial advice. Trade with proper risk management.
#grass
Entry: $0.3743
Stop Loss: $0.3570
Take Profit 1: $0.3900
Take Profit 2: $0.4100
Take Profit 3: $0.4350
📊 Trade Rationale
• Higher Time Frame: Bullish structure remains intact.
• Momentum: Strong buying momentum supports continuation.
• Trend: Price is trading with bullish market structure, favoring long positions.
• Risk/Reward: Targets provide a favorable upside relative to the defined stop.
Trade Management:
🔹 Secure partial profits at TP1.
🔹 After TP1, consider moving SL to breakeven.
🔹 Avoid over-leveraging; risk only a small portion of your account.
⚠️ Not financial advice. Trade with proper risk management.
#grass
$VELVET — SHORT 🔴
Entry: $0.1121
Stop Loss: $0.1165
Take Profit 1: $0.1070
Take Profit 2: $0.1020
Take Profit 3: $0.0960
Trade Bias: Bearish 📉
Time Frame: High Time Frame
Momentum: Strong
Why SHORT?
• Higher-timeframe structure remains bearish.
• Strong downside momentum favors continuation.
• Current price offers a favorable risk-to-reward setup if bearish structure holds.
• Key support levels below provide logical profit targets.
⚠️ Risk Management: Use low leverage and risk only a small portion of your trading capital. Move SL to entry after TP1 if momentum confirms.
Trade smart. Protect your capital.
#velvet
Entry: $0.1121
Stop Loss: $0.1165
Take Profit 1: $0.1070
Take Profit 2: $0.1020
Take Profit 3: $0.0960
Trade Bias: Bearish 📉
Time Frame: High Time Frame
Momentum: Strong
Why SHORT?
• Higher-timeframe structure remains bearish.
• Strong downside momentum favors continuation.
• Current price offers a favorable risk-to-reward setup if bearish structure holds.
• Key support levels below provide logical profit targets.
⚠️ Risk Management: Use low leverage and risk only a small portion of your trading capital. Move SL to entry after TP1 if momentum confirms.
Trade smart. Protect your capital.
#velvet
🚀 $AKE — LONG SETUP 🟢
Entry: $0.00885
Bias: Bullish 📈
High-Timeframe Trend: Bullish ✅
Momentum: Strong 🔥
🎯 Take-Profit Targets
* TP1: $0.00945
* TP2: $0.00990
* TP3: $0.01050
🛑 Stop Loss: $0.00855
Why this setup?
• Higher-timeframe structure remains bullish.
• Strong momentum supports continuation toward the next resistance zones.
• Entry offers a defined risk level below the recent support area.
• If TP1 is reached, consider moving SL to entry to protect capital.
⚠️ Risk Management: Never risk more than you can afford to lose. Use appropriate leverage and always set your SL.
TradeWithYota 📊
Entry: $0.00885
Bias: Bullish 📈
High-Timeframe Trend: Bullish ✅
Momentum: Strong 🔥
🎯 Take-Profit Targets
* TP1: $0.00945
* TP2: $0.00990
* TP3: $0.01050
🛑 Stop Loss: $0.00855
Why this setup?
• Higher-timeframe structure remains bullish.
• Strong momentum supports continuation toward the next resistance zones.
• Entry offers a defined risk level below the recent support area.
• If TP1 is reached, consider moving SL to entry to protect capital.
⚠️ Risk Management: Never risk more than you can afford to lose. Use appropriate leverage and always set your SL.
TradeWithYota 📊
$PEOPLE — SHORT 🔴
Entry: $0.007803
Bias: High-Timeframe Bearish 🔻
Momentum: Strong 🔻
🎯 Take-Profit Targets
* TP1: $0.00750
* TP2: $0.00715
* TP3: $0.00670
🛑 Stop Loss: $0.00810
Why this setup?
• Higher-timeframe structure remains bearish
• Strong downside momentum favors continuation
• Entry offers a defined risk zone with multiple downside targets
• If TP1 hits, consider moving SL toward breakeven
⚠️ Risk Management: Use low leverage and never risk more than you can afford to lose.
#PEOPLE
TradeWithYota
Entry: $0.007803
Bias: High-Timeframe Bearish 🔻
Momentum: Strong 🔻
🎯 Take-Profit Targets
* TP1: $0.00750
* TP2: $0.00715
* TP3: $0.00670
🛑 Stop Loss: $0.00810
Why this setup?
• Higher-timeframe structure remains bearish
• Strong downside momentum favors continuation
• Entry offers a defined risk zone with multiple downside targets
• If TP1 hits, consider moving SL toward breakeven
⚠️ Risk Management: Use low leverage and never risk more than you can afford to lose.
#PEOPLE
TradeWithYota
$MORPHO — LONG 🟢
💰 Entry: $2.579
🛑 Stop Loss: $2.450
🎯 TP1: $2.720
🎯 TP2: $2.900
🎯 TP3: $3.150
📊 Setup Rationale
• Higher-timeframe structure remains bullish
• Strong momentum supports continuation
• Entry offers a favorable risk/reward profile
• TP levels target potential resistance/expansion zones
⚠️ Risk management: Move SL to entry after TP1 and secure partial profits progressively.
Trade with a plan. Never risk more than you can afford to lose.
#Morpho
💰 Entry: $2.579
🛑 Stop Loss: $2.450
🎯 TP1: $2.720
🎯 TP2: $2.900
🎯 TP3: $3.150
📊 Setup Rationale
• Higher-timeframe structure remains bullish
• Strong momentum supports continuation
• Entry offers a favorable risk/reward profile
• TP levels target potential resistance/expansion zones
⚠️ Risk management: Move SL to entry after TP1 and secure partial profits progressively.
Trade with a plan. Never risk more than you can afford to lose.
#Morpho
Log in to explore more content