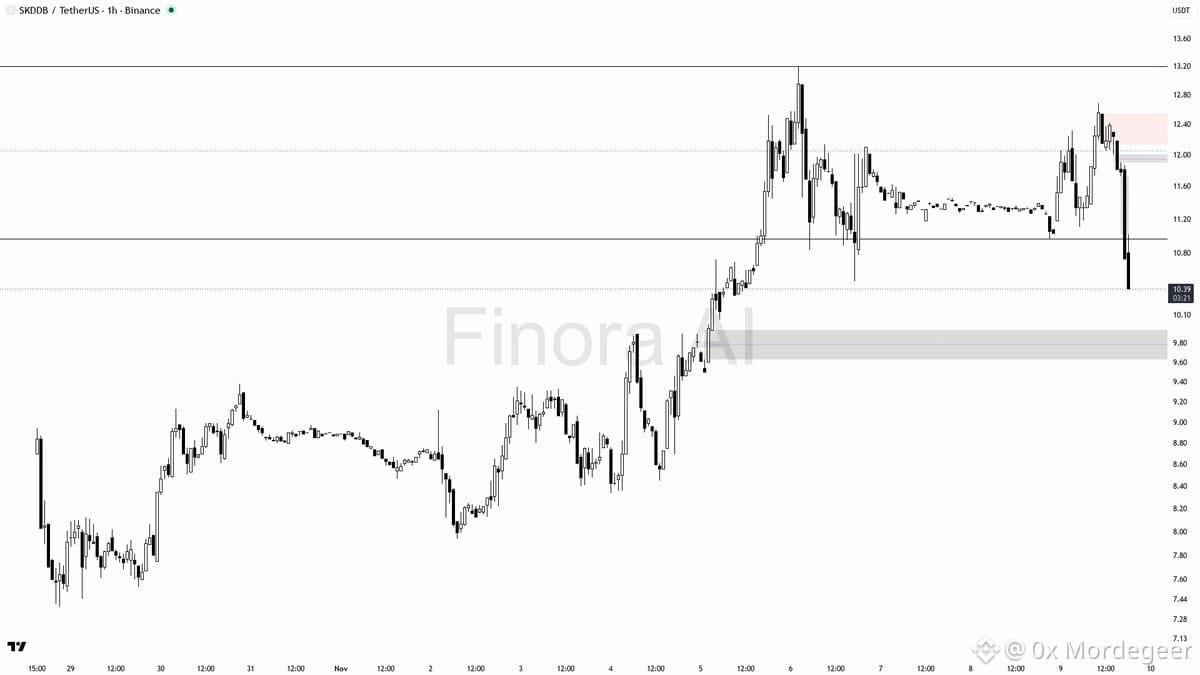
📊 $SKDDB Technical Analysis & Setup
The 1h structure for $SKDDB is firmly bearish with lower highs and lows. A sharp -2.9% drop on a 2.3x volume spike signals distribution as price trades near 10.39 below key EMAs.
• Key Support / Demand: 10.58, 10.27, and the 9.80–8.90 demand zone
• Resistance / Supply Targets: 11.45–11.93 supply/FVG cluster and 12.68 swing high
• Trigger / Confirmation: Short entry on a weak retest of the 11.45–11.93 zone with lower-timeframe bearish rejection
• Risk / Invalidation: 1h close above 12.68 flips structure bullish
• Market Execution: Monitor BTC buy-side pressure for choppy rebounds and wait for solid confirmation before entry
DYOR — Educational setup, not financial advice.
#BinanceSquare #Crypto #SKDDB #Trading
$NEAR
The 1h structure for $SKDDB is firmly bearish with lower highs and lows. A sharp -2.9% drop on a 2.3x volume spike signals distribution as price trades near 10.39 below key EMAs.
• Key Support / Demand: 10.58, 10.27, and the 9.80–8.90 demand zone
• Resistance / Supply Targets: 11.45–11.93 supply/FVG cluster and 12.68 swing high
• Trigger / Confirmation: Short entry on a weak retest of the 11.45–11.93 zone with lower-timeframe bearish rejection
• Risk / Invalidation: 1h close above 12.68 flips structure bullish
• Market Execution: Monitor BTC buy-side pressure for choppy rebounds and wait for solid confirmation before entry
DYOR — Educational setup, not financial advice.
#BinanceSquare #Crypto #SKDDB #Trading
$NEAR