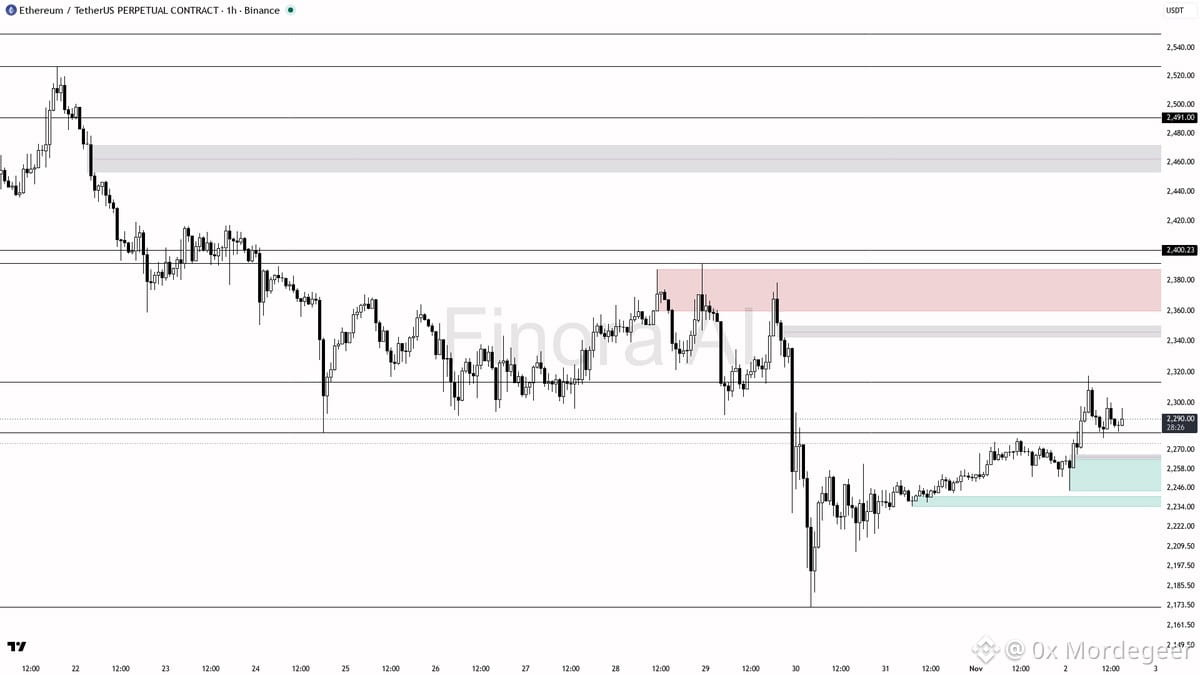
📊 ETH Technical Analysis & Setup
ETH is printing a +1.4% recovery, holding a crucial higher low on the 1H chart against a broader daily bearish structure while macro alignment favors the longs.
• Key Support / Demand: 2277.49 level / 2278–2292 entry zone following a liquidity sweep.
• Resistance / Supply Targets: 2314–2317 swing high liquidity, then 2322 and 2350.
• Trigger / Confirmation: Wait for a sweep-and-reclaim of 2277, rejection wick, or 1H bullish engulfing / MSS on lower timeframes; do not chase thin volume breaks.
• Risk / Invalidation: A 1H close below 2277.49 flips the bias bearish.
• Market Execution: Monitor volume and order book depth carefully amidst light 0.62x volume conditions.
DYOR — Educational setup, not financial advice. Manage your risk closely.
#BinanceSquare #Crypto #ETH #Trading
$ETH
ETH is printing a +1.4% recovery, holding a crucial higher low on the 1H chart against a broader daily bearish structure while macro alignment favors the longs.
• Key Support / Demand: 2277.49 level / 2278–2292 entry zone following a liquidity sweep.
• Resistance / Supply Targets: 2314–2317 swing high liquidity, then 2322 and 2350.
• Trigger / Confirmation: Wait for a sweep-and-reclaim of 2277, rejection wick, or 1H bullish engulfing / MSS on lower timeframes; do not chase thin volume breaks.
• Risk / Invalidation: A 1H close below 2277.49 flips the bias bearish.
• Market Execution: Monitor volume and order book depth carefully amidst light 0.62x volume conditions.
DYOR — Educational setup, not financial advice. Manage your risk closely.
#BinanceSquare #Crypto #ETH #Trading
$ETH