

The Binance withdrawal whitelist is a setting that lets your account send crypto only to addresses you approved in advance. You switch it on under Settings, then Withdrawal, add your own wallet addresses in Address Management, and confirm each step with a passkey or 2FA.
👉 Open a Binance account with code GETREWARD
If someone gets into your account, the whitelist means they cannot just paste their own address and drain it. They would first have to add a new address, and with the withdrawal limit switched on, that address stays blocked for 24, 48 or 72 hours. That window is your chance to notice and lock things down.
This guide is a checklist in three parts: what to prepare before you touch the setting, how to set it up, and what to check afterwards. Tick the items off in order and the whole job takes about 20 minutes, plus the waiting time you choose.
What does the whitelist actually block?
With the whitelist off, any address typed into the withdrawal form is accepted once you pass verification. With it on, the form only lets you send to saved addresses that carry the whitelist mark.
It does not stop someone from logging in, placing trades or changing other settings. It narrows one door, the one where crypto leaves the account. That is why it works as a layer on top of 2FA, not as a replacement for it.
Before you start, what should be ready?
Go through these items first. Each one saves you a failed attempt or a locked withdrawal later.
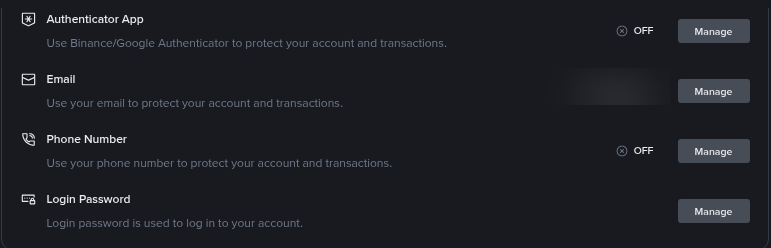
2FA or a passkey is active: Every whitelist action asks for verification, so an authenticator app or passkey has to be set up on the account.
Your own receiving addresses: Copy them from your hardware wallet, mobile wallet or other exchange account, straight from that app, not from an old chat or email.
The network for each address: Note whether the address is for BNB Smart Chain, Ethereum, Tron, Bitcoin or another network. The same coin on the wrong network can be lost.
Memo or tag details: Some exchanges need a memo or tag along with the address. Write it down next to the address if the receiving platform shows one.
A quiet moment: Do not set this up the day you need to move funds. Changes to the whitelist can pause withdrawals for a while.
The security settings page is where the 2FA methods live. Check that at least one strong method shows as active before you go further.
How do you switch the whitelist on?
On the website, hover over the profile icon and open Settings. Scroll to the Withdrawal section and click Enable next to Withdrawal Whitelist.
A notice explains that once it is on, you can only withdraw to addresses on your whitelist. Confirm, then verify with your passkey or 2FA. The setting is now active.
In the mobile app, the same controls sit on the Withdrawal Address page. The Whitelist tab there lets you turn the whitelist and one-step withdrawal on or off, and the All tab lists every saved address.
How do you add an address the right way?
Under Settings, then Withdrawal, open Address Management. Hover over Add and choose Add address, or Add Multiple Addresses if you have several.
Label: Give it a name you will recognise at a glance, such as "Ledger BTC" or "Trust Wallet BNB". Vague labels like "wallet 2" cause mistakes months later.
Coin and network: Pick a specific coin and its network, or tick the option for a universal address, which works for every coin on that network.
Address origin: This optional field asks whether the address belongs to an exchange, a personal wallet or something else. Pick the honest answer.
Memo: Fill it in when the receiving exchange requires one. Leave it empty for a personal wallet that does not use memos.
Whitelist box: Tick Add Address to Whitelist before you click Save. Without that tick, the address is saved but still cannot receive withdrawals while the whitelist is on.
Complete 2FA once more and the address appears with its whitelist mark. Binance accepts a maximum of 200 whitelisted addresses, which is far more than most people need.
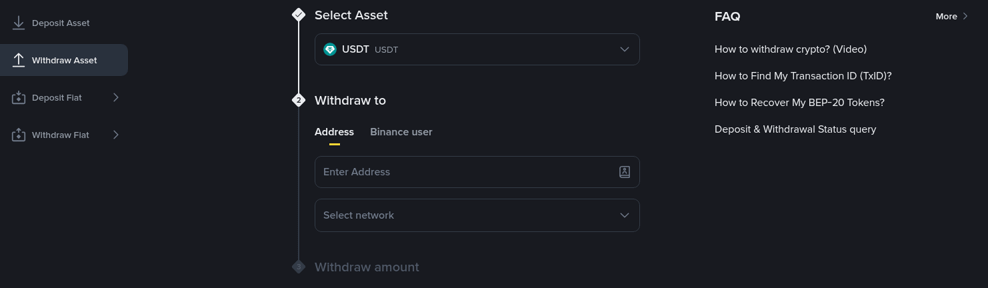
Inside the withdrawal form, the small address book icon in the address field opens this same list, so you pick a saved address instead of pasting one.
Should you turn on the whitelist withdrawal limit?
Yes, for most people. This separate switch blocks withdrawals to any newly added whitelist address for a period you choose: 24, 48 or 72 hours.
Turn it on under Settings, then Withdrawal, then Whitelist Withdrawal Limit. Pick the period and confirm. To change the period later, use Manage.
Here is an illustrative timeline with a 48-hour limit. You add a new hardware wallet address on Monday at 09:00. Withdrawals to that address open on Wednesday at 09:00. Withdrawals to addresses you whitelisted before Monday keep working as normal.
Now the same timeline from an attacker's side. Someone logs in on Monday night and adds their own address. They still cannot send anything there until Wednesday night, and in that gap you get the email and app alerts for the new address.
The trade-off is speed. If you switch the limit off, every whitelisted address works at once, including ones added a minute ago, which removes the delay that protects you.
Which mistakes cause most whitelist trouble?
Whitelisting an address from a message: Scammers send "support" chats with an address to add. Any address that did not come from your own wallet app should never go on the list.
Wrong network: An Ethereum address saved under BNB Smart Chain may look identical, yet the funds go somewhere you did not plan. Match the network to what the receiving wallet shows.
Missing memo: Sending to another exchange without its memo can leave funds stuck until that exchange's support finds them, if it can.
Setting it up right before a transfer: Adding an address with a 72-hour limit on the day of a big move means waiting three days.
Turning it off to save time: Disabling the whitelist while the limit is on suspends withdrawals for the chosen period anyway, so it rarely saves time.
How do you test the setup safely?
Run one small withdrawal before trusting the setup with a larger amount. The illustrative example below uses round numbers so the logic is easy to follow.
Test amount: Send 20 USDT to your new whitelisted wallet once its waiting period has passed. Check the network fee shown on the form before you confirm.
Confirm arrival: Look for the transaction in the receiving wallet and compare the TxID with the one in your Binance withdrawal history.
Then the main amount: If the 20 USDT arrived correctly, the address, network and memo are right, and the next transfer can be larger.
Also try to withdraw to an address that is not on your list. The form should refuse it. If it does not, the whitelist is not switched on.
Before any transfer, check the network status on the withdrawal screen. Binance can pause withdrawals on a single network, or across the platform, during maintenance or a security review.
What should you check after setup?
Once a month, or after any change to your wallets, run through this short review.
Remove old addresses: A wallet you no longer use is still a valid exit. Open the menu next to it in Address Management and choose Remove from Whitelist.
Read every alert: An email or app notice about a new whitelist address that you did not add means you should change your password and 2FA and contact support from inside the app.
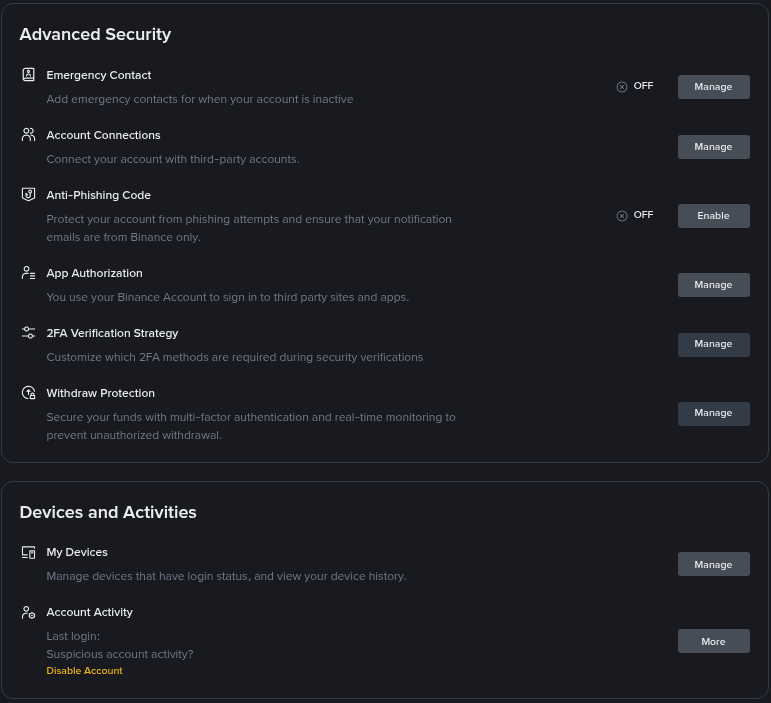
Turn on the anti-phishing code: It adds a personal word to genuine Binance emails, so a fake "address added" email without your word stands out.
Check devices: The Devices and Activities section lists logged-in devices. Remove any you do not recognise.
Our guide to withdrawing crypto from Binance step by step covers networks and the withdrawal form in more detail.
Should you allow small withdrawals without 2FA?
One-step withdrawal lets you send a small amount to a whitelisted address without completing 2FA each time. You set the quota yourself under Settings, then Withdrawal, and Binance notes that 2FA may still be requested in some cases.
It is convenient for regular small transfers to your own wallet. Keep the quota low, though, because it is the amount someone with access to your logged-in session could move with fewer checks.
Which helps more, the whitelist or the phishing code?
They guard different things. The anti-phishing code helps you spot fake emails before you click a bad link and hand over your login. The whitelist limits the damage if your login is taken anyway.
Use both. Most account takeovers start with a phishing page, so it also helps to read our breakdown of how common Binance scams work and what they look like.
Your complete checklist in one place
Before: 2FA or passkey active, addresses copied from your own wallets, network and memo written down, no transfer planned for the next few days.
Setup: Withdrawal Whitelist enabled, addresses added with clear labels and the whitelist box ticked, Whitelist Withdrawal Limit set to 24, 48 or 72 hours.
Test: One small withdrawal after the waiting period, arrival confirmed, a non-listed address refused.
After: Old addresses removed, anti-phishing code on, devices reviewed, alerts read.
Opening a new account? You can see the current Binance welcome bonus campaign to check which tasks and reward limits apply to eligible new users.
Sign-up code: GETREWARD
FAQ
Does the whitelist apply to transfers to another Binance user?
The whitelist covers on-chain withdrawals to saved addresses. Check the Withdraw screen for how internal transfers behave on your account before relying on it for those.
Can I add an address while the whitelist is on?
Yes. New addresses can be added at any time, but with the withdrawal limit enabled they stay blocked for the period you chose.
Can support lift the waiting period early?
Do not count on it. Plan whitelist changes a few days before you need to move funds.
What happens if I disable the whitelist?
You can withdraw to any address again, but if the withdrawal limit was on, withdrawals are suspended for 24, 48 or 72 hours first.
Does the whitelist work in the mobile app?
Yes. The Withdrawal Address page in the app has a Whitelist tab where you can turn it on and manage saved addresses.
Disclosure: this article includes a Binance sign-up link with the code GETREWARD. Crypto prices can fall. This is not financial advice.