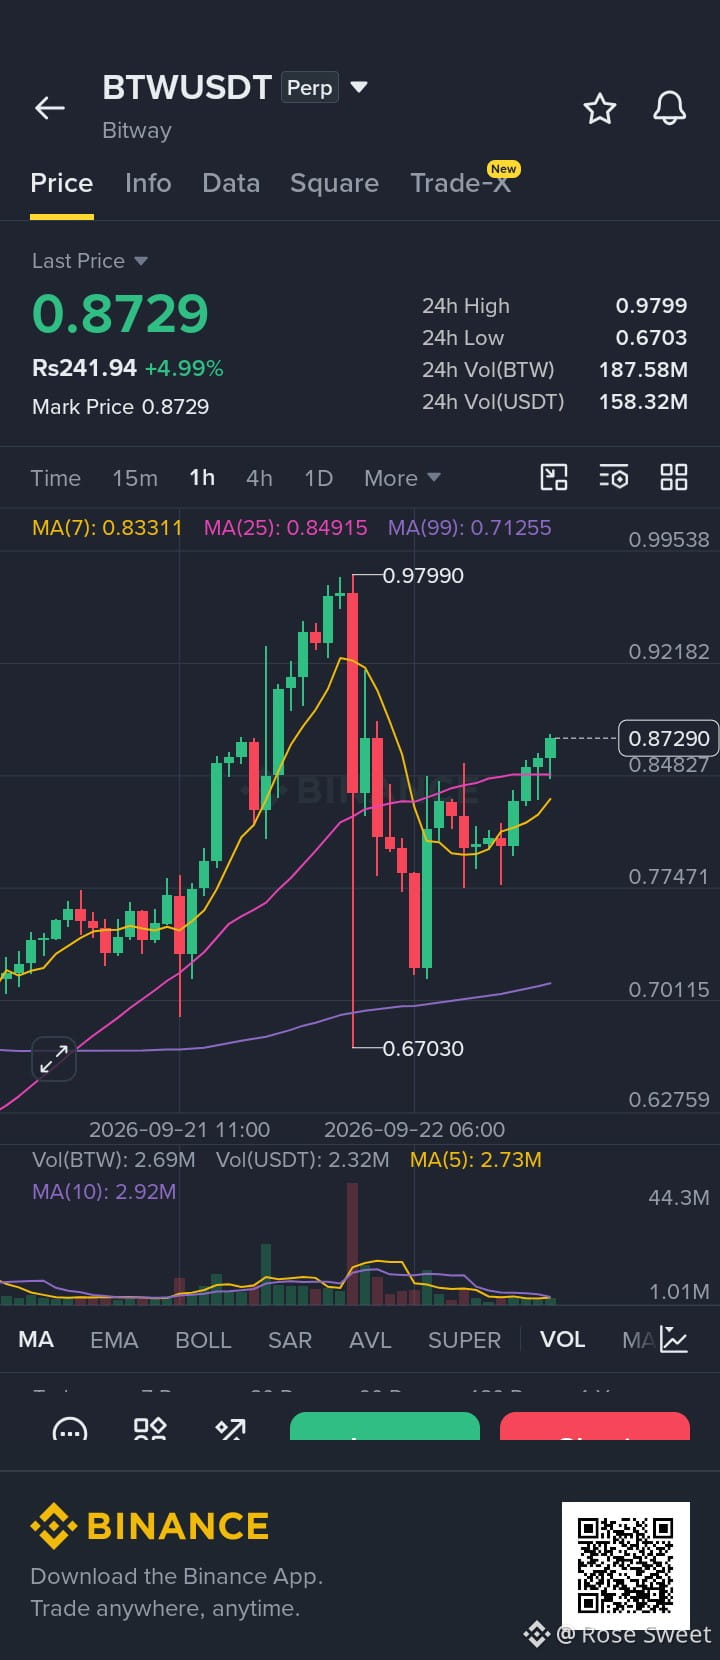
🟢 $BTW /USDT | Bias: Strong LONG (6/11 signals aligned)
Technical Verdict: STRONG LONG. 6 indicators green, only 1 red.
✅ 4H Trend: Price holding above EMA50 & EMA200 (bullish stack)
✅ 1H Trend: Price holding above EMA50 & EMA200 (bullish stack)
✅ 4H RSI: 60.6 — clean bullish momentum
✅ 1H RSI: 55.9 — sitting comfortably above key levels
⚠️ Caution: RSI z-score is at +2.59 within a range, raising the risk of a local pullback.
Why go long if the daily chart is ranging and RSI looks stretched?
Lower timeframes tell the story: both the 4H and 1H show healthy EMA stacks, and 4H momentum is strong at 60.6.
Where is the entry zone?
With 1H price around 0.8712, the optimal buy zone sits between 0.8665 and 0.8759.
When does the setup break down?
A candle close below 0.6616 invalidates the idea (structural SL at 0.7450).
🎯 Entry: 0.8665 – 0.8759
🛑 Stop Loss: 0.7450
🏁 Targets: TP1: 0.9658 | TP2: 1.0289 | TP3: 1.1236
$BTW
$LINK #AIStocksWhatNext #BNBMarketCapPassesBNYMellon
Technical Verdict: STRONG LONG. 6 indicators green, only 1 red.
✅ 4H Trend: Price holding above EMA50 & EMA200 (bullish stack)
✅ 1H Trend: Price holding above EMA50 & EMA200 (bullish stack)
✅ 4H RSI: 60.6 — clean bullish momentum
✅ 1H RSI: 55.9 — sitting comfortably above key levels
⚠️ Caution: RSI z-score is at +2.59 within a range, raising the risk of a local pullback.
Why go long if the daily chart is ranging and RSI looks stretched?
Lower timeframes tell the story: both the 4H and 1H show healthy EMA stacks, and 4H momentum is strong at 60.6.
Where is the entry zone?
With 1H price around 0.8712, the optimal buy zone sits between 0.8665 and 0.8759.
When does the setup break down?
A candle close below 0.6616 invalidates the idea (structural SL at 0.7450).
🎯 Entry: 0.8665 – 0.8759
🛑 Stop Loss: 0.7450
🏁 Targets: TP1: 0.9658 | TP2: 1.0289 | TP3: 1.1236
$BTW
$LINK #AIStocksWhatNext #BNBMarketCapPassesBNYMellon