$BTC Detailed Technical Breakdown
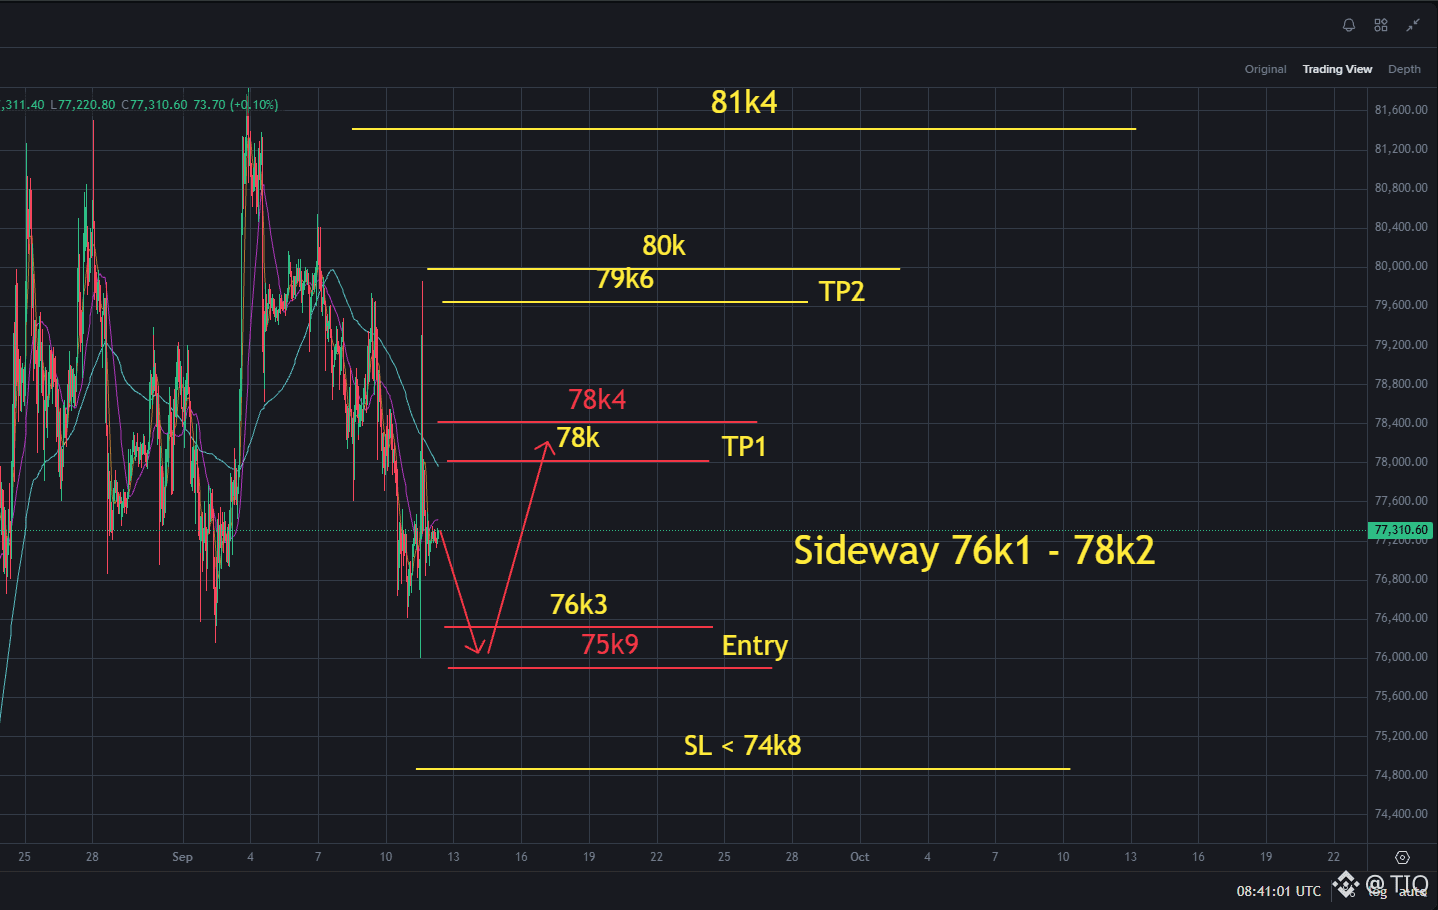
💥 Price remains bound inside a clear consolidation channel between 76k1 - 78k2. To maximize risk to reward and avoid chop in the middle of the range, the high-confluence plan waits for a final liquidity sweep down to the lower demand block before triggering a sharp reversal upward.
💥 Support & Long Entry Zone:
👉 Primary Entry Zone: 75k9 – 76k3 (Key structural demand block at the lower range boundary to execute Long orders)
👉 Key Invalidation (SL): A clean breakdown and candle close below SL 74k8 invalidates this Long scenario, signaling a deeper breakdown toward major macro support.
📌 Trading Plan (Long Setup):
👉 Long Entry Zone: 75k9 - 76k3 (Wait for price to retest into support to capture low-risk, high-reward entry setups)
👉 Stop Loss (SL): < 74k8 (Strict invalidation level below structural swing support to protect trading capital)
🎯 Take Profit Targets:
🎉 TP1: 78k - 78k4 (First major supply block / upper range boundary; lock in partial profits and move SL to breakeven)
🎉 TP2: 79k6 - 80k (Major structural expansion target block near higher overhead resistance)
🎉 Macro Horizon Ceiling: Overhead structural resistance sits higher around 81k4.
Click here to view the chart 👇️👇👇
💥 Price remains bound inside a clear consolidation channel between 76k1 - 78k2. To maximize risk to reward and avoid chop in the middle of the range, the high-confluence plan waits for a final liquidity sweep down to the lower demand block before triggering a sharp reversal upward.
💥 Support & Long Entry Zone:
👉 Primary Entry Zone: 75k9 – 76k3 (Key structural demand block at the lower range boundary to execute Long orders)
👉 Key Invalidation (SL): A clean breakdown and candle close below SL 74k8 invalidates this Long scenario, signaling a deeper breakdown toward major macro support.
📌 Trading Plan (Long Setup):
👉 Long Entry Zone: 75k9 - 76k3 (Wait for price to retest into support to capture low-risk, high-reward entry setups)
👉 Stop Loss (SL): < 74k8 (Strict invalidation level below structural swing support to protect trading capital)
🎯 Take Profit Targets:
🎉 TP1: 78k - 78k4 (First major supply block / upper range boundary; lock in partial profits and move SL to breakeven)
🎉 TP2: 79k6 - 80k (Major structural expansion target block near higher overhead resistance)
🎉 Macro Horizon Ceiling: Overhead structural resistance sits higher around 81k4.
Click here to view the chart 👇️👇👇