

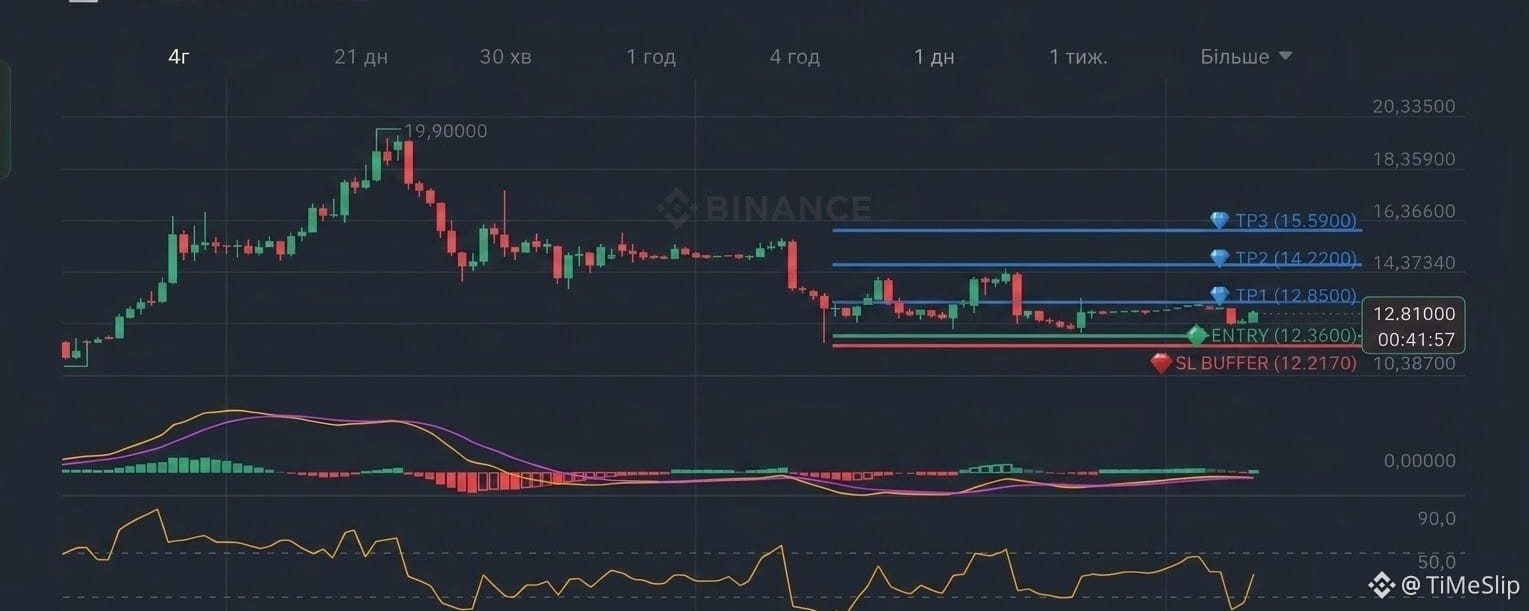

Trading bounce setups effectively requires precise execution, disciplined risk management, and a clear understanding of candle closures versus price wicks. Here is a complete breakdown of how to trade our SNXX/USDT 4H signal safely and maximize your profits.
Signal Breakdown & Market Context
Asset & Timeframe: $SNXX (4-Hour Chart)
Direction: 🟢 LONG (BUY) — Bounce Strategy
Indicators: Supertrend & RSI Confirmed
Smart Money Sentiment: LONG 61.53% | SHORT 38.47%
Trend Context: Overall 4H and 1D trends are Bearish 🔴. Because this is a localized bounce play against the higher timeframe trend, strict adherence to risk management rules is mandatory.
Key Targets & Levels
Entry Zone: 12.3600
Take Profit 1 (TP1): 12.8500 (Secure initial profits and move Stop Loss to Break-Even)
Take Profit 2 (TP2): 14.2200 (Main target on price continuation)
Take Profit 3 (TP3): 15.5900 (Extended profit target)
Risk Management & Exit Rules
Wick vs. Body Closure: A sharp downward wick (shadow) below 12.3600 is not a signal to close your position. Crypto markets frequently trigger wicks to collect liquidity. Hold your trade as long as the candle stays active.
Confirmed 4H Body Closure: If a 4-hour candle body officially closes below 12.3600, the bounce setup is invalidated. Close your position manually at the candle close.
Emergency Stop-Loss Buffer (12.2170): If high market volatility causes a sharp drop touching 12.2170, close the trade immediately without waiting for the 4-hour candle to close. This acts as your hard safety cap against sudden dumps.
Step-by-Step Execution Checklist
Enter Trade: Open your Long position at or near 12.3600.
Set Emergency Stop: Place a hard emergency stop order at 12.2170.
Monitor 4H Closes: Watch where each 4-hour candle body closes relative to 12.3600.
Hit TP1 (12.8500): Take partial profits and move your Stop Loss to your entry price (12.3600). Your trade is now completely risk-free.
Ride the Trend: Allow the remaining position to run toward TP2 (14.2200) and TP3 (15.5900).