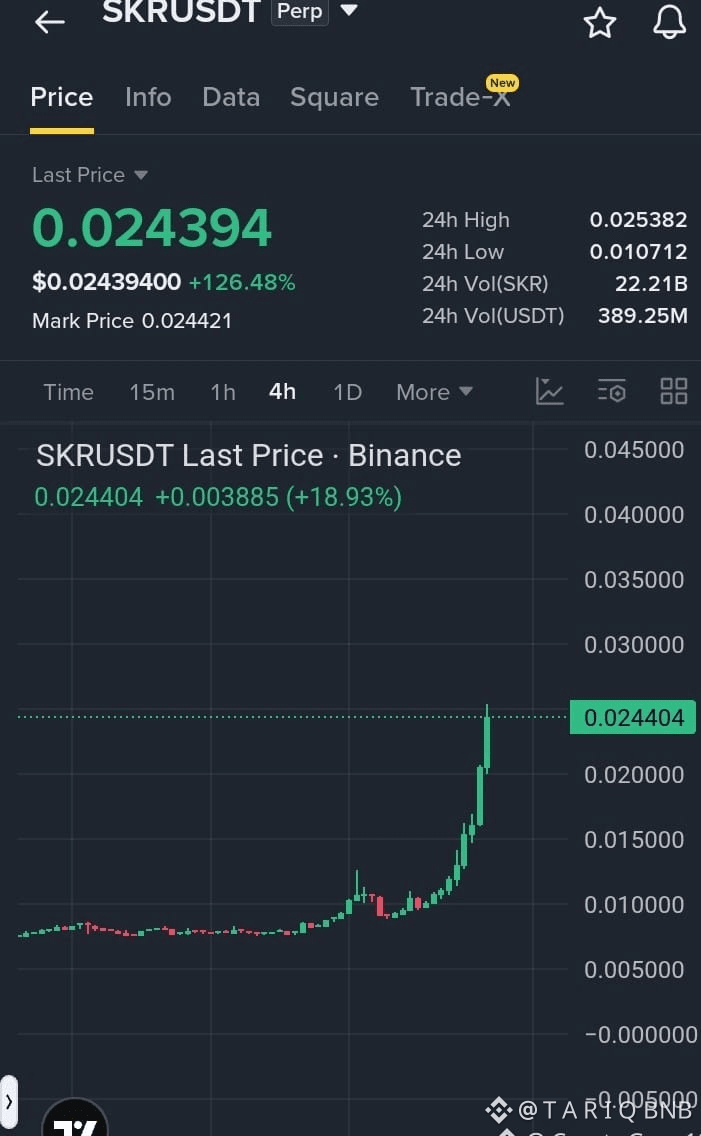
Trade Signal Summary: $SKR Long Continuation
Execution Parameters
Trade Direction: Long (Bullish Breakout)
Entry Zone: $0.0228 – $0.0244
Stop Loss (SL): $0.0212 (Trade invalidation level)
Take-Profit Targets
TP1: $0.0250 (First scale-out / de-risk)
TP2: $0.0256 (Secondary target)
TP3: $0.0263 (Final target)
Key Technical Context
Critical Support: $0.0200 – $0.0220
Structure: High-volume breakout out of long-term accumulation. As long as price holds above $0.0220, the macro trend favors continuation.
Execution Strategy & Risk Management
Entry Placement: Aim to fill limit orders toward the lower end of the entry range ($0.0228–0.0232). Entering at the upper boundary (0.0244) skews your Risk-to-Reward ratio unfavorably relative to TP1 (0.0250).
Volatility Caution: Elevated volume means sharp pullbacks are common post-breakout. Keep your stop loss firm at 0.0212 to protect capital against fakeouts.
$TUT
$BTR
Execution Parameters
Trade Direction: Long (Bullish Breakout)
Entry Zone: $0.0228 – $0.0244
Stop Loss (SL): $0.0212 (Trade invalidation level)
Take-Profit Targets
TP1: $0.0250 (First scale-out / de-risk)
TP2: $0.0256 (Secondary target)
TP3: $0.0263 (Final target)
Key Technical Context
Critical Support: $0.0200 – $0.0220
Structure: High-volume breakout out of long-term accumulation. As long as price holds above $0.0220, the macro trend favors continuation.
Execution Strategy & Risk Management
Entry Placement: Aim to fill limit orders toward the lower end of the entry range ($0.0228–0.0232). Entering at the upper boundary (0.0244) skews your Risk-to-Reward ratio unfavorably relative to TP1 (0.0250).
Volatility Caution: Elevated volume means sharp pullbacks are common post-breakout. Keep your stop loss firm at 0.0212 to protect capital against fakeouts.
$TUT
$BTR