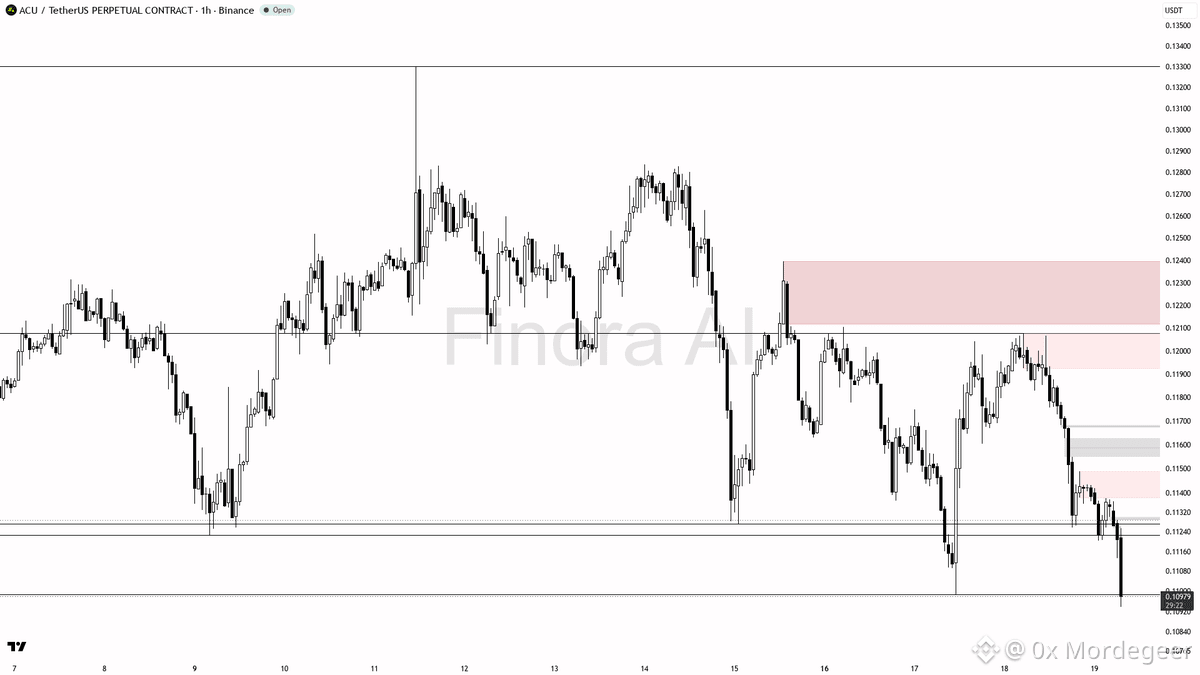
📊 $ACU Technical Analysis & Setup
Heavy volume backs the current breakdown, keeping the 1h structure bearish while price sits below reclaimed levels and key EMAs.
• Key Support / Demand: 0.1092 first target, extending toward the 0.1045 major demand area.
• Resistance / Supply Targets: Relief bounce zone at 0.1117, 0.1132.
• Trigger / Confirmation: Wait for a relief bounce into supply, followed by a rejection, bearish engulfing or pin bar, and a lower-timeframe structure shift.
• Risk / Invalidation: 1h close above 0.12066 invalidates the bearish bias.
• Market Execution: Manage risk tightly; avoid chasing shorts directly after volume shocks and use proper position sizing.
DYOR — Educational setup, not financial advice.
#BinanceSquare #Crypto #ACU #Trading
Heavy volume backs the current breakdown, keeping the 1h structure bearish while price sits below reclaimed levels and key EMAs.
• Key Support / Demand: 0.1092 first target, extending toward the 0.1045 major demand area.
• Resistance / Supply Targets: Relief bounce zone at 0.1117, 0.1132.
• Trigger / Confirmation: Wait for a relief bounce into supply, followed by a rejection, bearish engulfing or pin bar, and a lower-timeframe structure shift.
• Risk / Invalidation: 1h close above 0.12066 invalidates the bearish bias.
• Market Execution: Manage risk tightly; avoid chasing shorts directly after volume shocks and use proper position sizing.
DYOR — Educational setup, not financial advice.
#BinanceSquare #Crypto #ACU #Trading