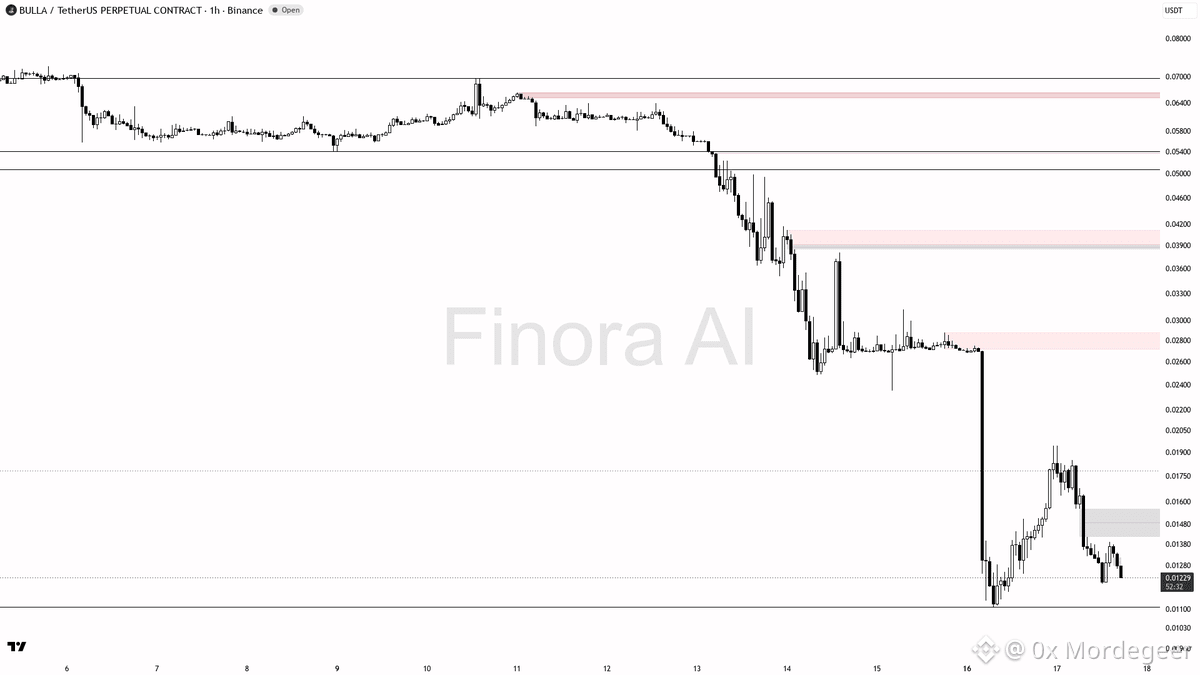
📊 $BULLA Technical Analysis & Setup
Bearish market structure favors further downside continuation following a sharp 4.1% flush, though chasing directly into current demand remains risky. Price action trades below key moving averages with seller-dominant flow.
• Key Support / Demand: 0.01202 breakdown level, with targets at 0.01110, 0.01019, and 0.00931 extension.
• Resistance / Supply Targets: 0.0140, 0.01464 retracement zone.
• Trigger / Confirmation: Wait for a retracement into supply followed by a rejection, bearish pin bar, or lower-timeframe structure shift. Alternatively, watch a breakdown and failed retest of 0.01202.
• Risk / Invalidation: 1h close above 0.01944 invalidates the bearish bias.
• Market Execution: Elevated ATR signals sharp wicks; manage position sizing carefully and prioritize risk control.
DYOR — Educational setup, not financial advice.
#BinanceSquare #Crypto #BULLA #Trading
Bearish market structure favors further downside continuation following a sharp 4.1% flush, though chasing directly into current demand remains risky. Price action trades below key moving averages with seller-dominant flow.
• Key Support / Demand: 0.01202 breakdown level, with targets at 0.01110, 0.01019, and 0.00931 extension.
• Resistance / Supply Targets: 0.0140, 0.01464 retracement zone.
• Trigger / Confirmation: Wait for a retracement into supply followed by a rejection, bearish pin bar, or lower-timeframe structure shift. Alternatively, watch a breakdown and failed retest of 0.01202.
• Risk / Invalidation: 1h close above 0.01944 invalidates the bearish bias.
• Market Execution: Elevated ATR signals sharp wicks; manage position sizing carefully and prioritize risk control.
DYOR — Educational setup, not financial advice.
#BinanceSquare #Crypto #BULLA #Trading