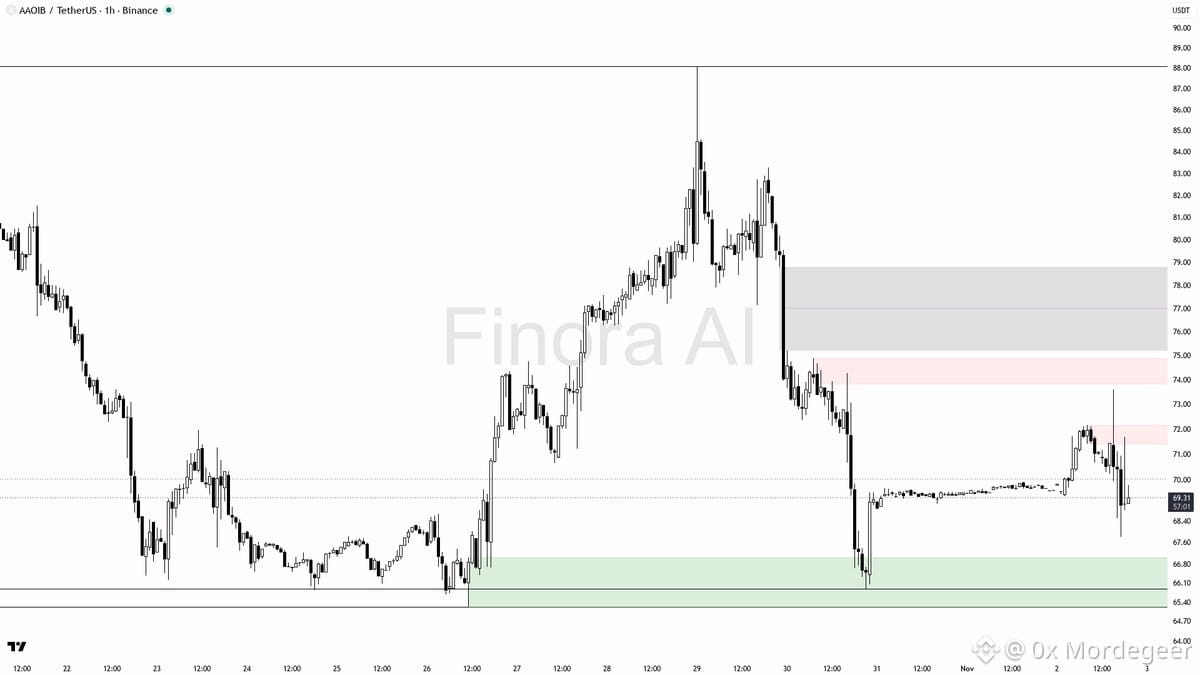
📊 $AAOIB Technical Analysis & Setup
Bearish momentum is dominating as lower highs align with a soft daily trend and broader market weakness, showing high-volume distribution into thin bids.
• Key Support / Demand: 67.65, followed by 66.03–65.89 and liquidity pockets at 64.59 and 63.63.
• Resistance / Supply Targets: 69.80–71.60 prior swing supply zone.
• Trigger / Confirmation: Short entry zone at 69.80–71.60 after a liquidity sweep of 69.35–72.16 fails, confirmed by a bearish engulfing, pin bar rejection, or 5-15m market structure shift lower.
• Risk / Invalidation: 1h close above 72.16 flips the bias bullish. Place protection beyond the structure flip.
• Market Execution: Scale sizing carefully while monitoring benchmark sell-side pressure and standard order book depth.
DYOR — Educational setup, not financial advice.
#BinanceSquare #Crypto #AAOIB #Trading
Bearish momentum is dominating as lower highs align with a soft daily trend and broader market weakness, showing high-volume distribution into thin bids.
• Key Support / Demand: 67.65, followed by 66.03–65.89 and liquidity pockets at 64.59 and 63.63.
• Resistance / Supply Targets: 69.80–71.60 prior swing supply zone.
• Trigger / Confirmation: Short entry zone at 69.80–71.60 after a liquidity sweep of 69.35–72.16 fails, confirmed by a bearish engulfing, pin bar rejection, or 5-15m market structure shift lower.
• Risk / Invalidation: 1h close above 72.16 flips the bias bullish. Place protection beyond the structure flip.
• Market Execution: Scale sizing carefully while monitoring benchmark sell-side pressure and standard order book depth.
DYOR — Educational setup, not financial advice.
#BinanceSquare #Crypto #AAOIB #Trading